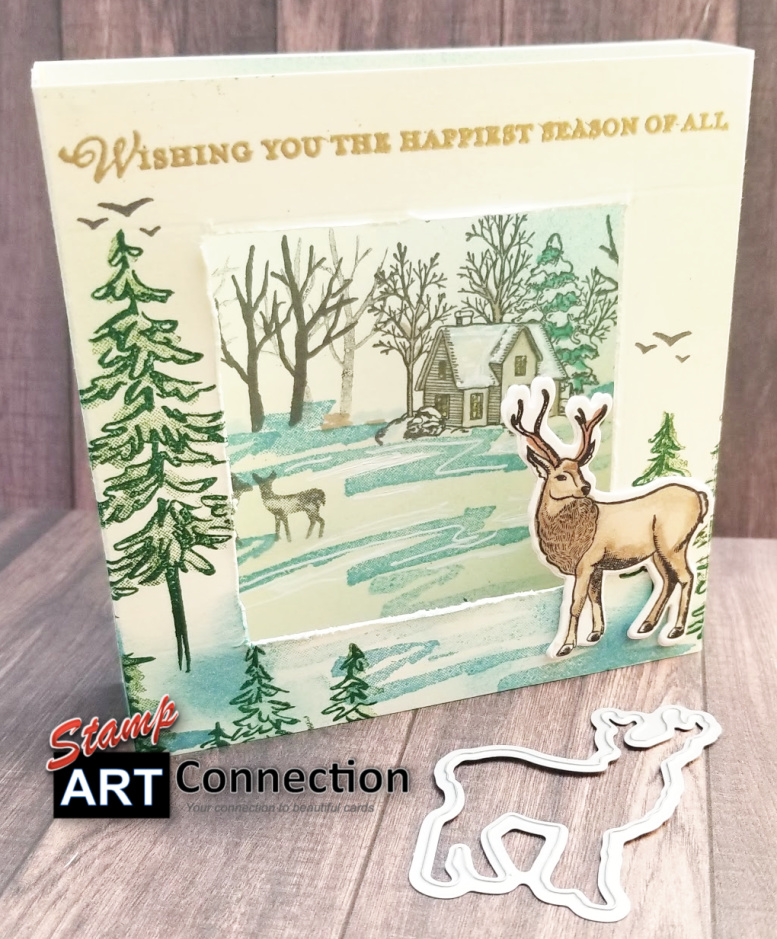
Fancy Folds: Scenic Holiday Shadow Box

Spread the love!

I found this great fancy fold technique that creates a shadow box that is great for a scenic holiday composition. It is easy to assemble and an added bonus is that folds easily to fit in a standard envelope for mailing! Definitely a great way to spread added “wow” this season!

I created this holiday card featuring a great stag standing proundly in the foreground around evergreen trees with a lovely cottage snow scene in the background.

All the products featured are available in the current Holiday Catalog — the WISHES & WONDER Bundle, SNOW FRONT, STILL SCENES, and IN THE PINES stamp set.

VIDEO TUTORIAL: Besides all the basic information needed; I’ve included a LINK to my YOUTUBE channel tutorial below for details and “tips” to create the card.


Supply List:

  • CARD STOCK:
    • Whisper White or Very Vanilla Cardstock (11″x4″)
    • SCORE: 1″, 5″, 6″ 10″ (along the 11″ side)
    • Whisper White or Very Vanilla Cardstock (4″x4″)
  • SCENIC STAMPS/DIES:
    • WISHES & WONDER
    • SNOW FRONT
    • STILL SCENES
    • IN THE PINES
  • INKS:
    • Momento Black
    • Basic Grey
    • Shaded Spruce
    • Garden Green
    • Balmy Blue
    • Pool Party
    • Versamark (for GOLD embossing powder)
  • STAMPIN’ BLENDS Pens (Light & Dark):
    • Shaded Spruce,
    • Crumb Cake,
    • Pool Party,
    • Bronze,
    • Balmy Blue,
    • Daffodil Delight
  • TOOLS:
    • Sponge Dauber
    • Score Board
    • Ruler
    • Cutting & Embossing Machine
    • Exacto Knife
    • Precision Shears
    • Heat Gun
  • ADHESIVES:
    • Tear Tape
    • All-Purpose Glue
    • Dimensionals

Directions:

  • Step ONE: Cut a sheet 11″ x 4″ and score at 1″, 5″, 6″ and 10″.
  • Step TWO: Measure 3/4 in from each side. Draw square lightly in pencil and cut the open frame area.
  • Step THREE: Stamp the foreground images and stamp and cut out the main image (i.e. stage).
  • Step FOUR: Cut a piece of whisper white cardstock 4″x 4″ square.
  • Step FIVE: Stamp distant background images on this panel which will be adhered to the inside of the shadowbox.
  • Step SIX: Sponge on or use the sponge brayer to color for the sky (Pool Party) and snow (Balmy Blue) and color the cottage with Stampin’ Blends (refer to the video tutorial for directions).

Shadow Box Tutorial


FEATURED PRODUCTS


Spread the love!

Pendulum Swing Cards

Spread the love!

During my weekly LIVE broadcast….after fixing a broken MIC….I took a project inspired by Jennifer McGuire to the next level by using all Stampin’ Up! products to create a fun pendulum card!

I created several Halloween inspired cards featuring the STITCHED RECTANGLES DIES, HALLOW NIGHT MAGIC DIES, HARVEST HELLO stamps, CAT PUNCH, SNOW FRONT Stamps & the APPLE BUILDER PUNCH.

Follow my VIDEO TUTORIAL for all the steps and product checklist provided below.

Refer to my earlier tutorial for how to create the background and then create a pendulum card with the cat punch.

Checklist:

  • STAMP SET: Harvest Hellos, Snow Front, Hallows Night Magic
  • DIES & PUNCHES: Apple Builder Punch, Halloween Magic Dies, Cat Builder Punch, Stitched Rectangles dies
  • CARD STOCK: Whisper White, Pumpkin Pie, Blackberry Bliss, Black Glitter Paper, Gold and Silver Foil Sheets
  • TOOLS: Clear and Silver Embossing Powder, Adhesive Sheet, Foam Adhesive Sheets, Foam Adhesive Strips, Hole Punch, 1 Cent coin or metal washer (for weight)
  • INKS: Versamark for Embossing, Memento Black Ink, Pumpkin Pie for pumpkins, Blackberry Bliss ink for the tiny bats
  • Retired items: Seasonal Layers Thinlet Dies (143751) for the branch, Gift Card Envelop, and Trims Thinlits Dies (135854) for the round die.

Video Tutorial


TRY THIS!!! Use the SNOWMAN SEASON Bundle to build a pendulum card for the winter holidays!


PRODUCTS:


Spread the love!