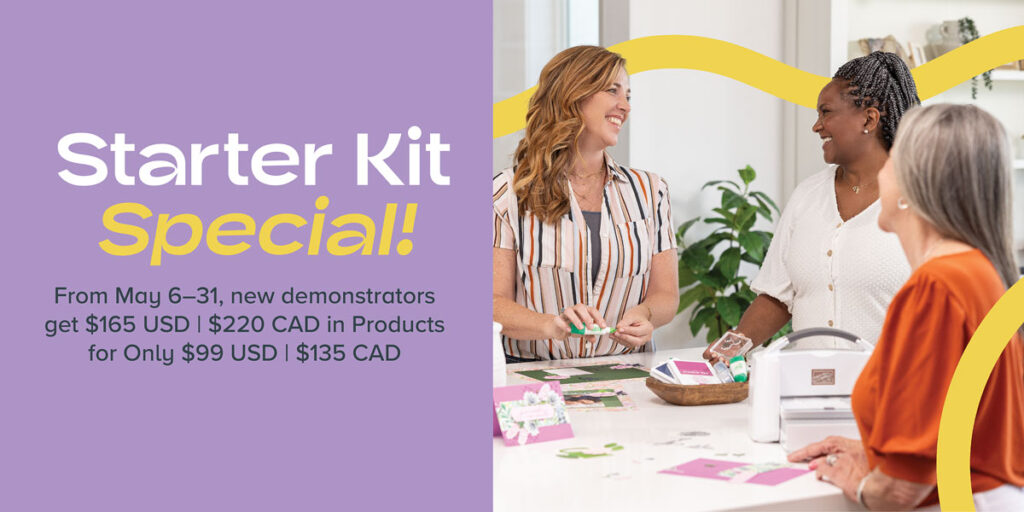
Join as a DEMONSTRATOR and get $125 USD | CAD 206 worth of products for only $99 USD | CAD 135 + free business supplies + free shipping + all the fun of being a part of Stampin’ Up!
JOIN RISK-FREE! Feel free to contact me with any questions!
A Mother’s Day Remembrance (in Memory of Barbara Oakeley-Mondagron)
As promised, here is the Double Open Show Stopper Card using (my personal favorite) the beautiful Perennial Lavender Suite from Stampin’ Up! This card design is not only visually striking, but also fun to create, making it perfect for sending your heartfelt greetings to someone special.
I have provided a video tutorial as well a PDF’s offers for both the card and the matching 7″ x 10.5″ Envelop Bag. All my customers/Down Lines get all my PDF’s for free — just send me an email and I will get it to you.
I think this card design is sure to be a hit for any occasion, from birthdays, weddings, and especially Mother’s Day. The Perennial Lavender DSP adds an elegant touch, and the Holographic TRIO Paper adds glimmer! Remember that some of these are retiring products and you need to act fast to ensure you have them available.
Shop Online for Convenience: To explore the full range of products and start creating your special card, shop online through the link below.
Shop NOW! since many of these products are part of the SALE and will sell out fast.
Blessings, Kat
NOTE: I usually have more photos of my projects; the one from this video in particular. However, last week my Aunt Barbara was very ill. I grabbed this card in the lovely envelop bag off my shelf the morning my husband and I traveled to Taos to visit her bedside. Before I left, I gave the card to my cousins as to gift to her from them before she passed. The sentiment “Where in the world would I be without you?” touched us all to tears. Where would we be without our mothers? Rest in Peace Tia…and blessings to you and your family.
Products Featured
PERENNIAL LAVENDER SUITE COLLECTION:
Perennial Postage stamp
Painted Lavender Stamp / Dies
Perennial Lavender 12″ x 12″ Designer Series Paper (DSP)
Any customers who designate me as their DEMONSTRATOR get ALL PDFs for FREE.
Double Open Show Stopper Card – Perennial Lavender SuiteProject PDF
PDF consists of five pages with project measurements and a separate paper template for making the fold-out mechanism as well as a detailed product list (10 pages total).
7″ x 10.5″ Envelop Bag PDF
Includes list of tools needed and 3 pages with illustration of all measurements for cutting and scoring.
Featured Products & ON-LINE STORE:
Here are some of the featured products that are available on my ONLINE store…so convenient — just click and it will ADD TO YOUR CART below:
Are you ready to take this home decor project to the next level? A new addition to the Stampin’ Up! Kit Collection, the Happy Houseplant Kit creates stunning pieces of wall art!
I showed my husband my project and he was so impressed he asked if he could gift them as a housewarming/birthday gift for my Mother-in-law who recently moved to Ohio! The ultimate compliment is when someone wants to share your work as a gift!
This Stampin’ Up! Kit Collection contains 4 projects, each with detailed instructions, so you can create with confidence. Add my additional techniques and transform your projects into works of art that will impress everyone who sees them.
My video tutorial begins by using shaping tools to create form and dimension to otherwise flat paper surfaces. I also demonstrate how to use sponge daubers with Garden Green, Granny Apple Green, Calypso Coral, and Pecan Pie ink to add additional color contrast around the edges of the leaves and shadow to pots. The sponge daubers allow you to easily apply the ink in a controlled manner, giving your project a professional finish.
But why stop there?
To add even more depth and realism to your project, try a graphic arts secret I learned in Architecture School for creating shadows around the background images. In the video, I used my Tombow N89 pen for this effect, but I recommend using Stampin’ Blends in Light Crumb Cake for the same beautiful result.
With these techniques and instructions, you can transform this project into works of art that will impress everyone who sees them. So why wait? Get your Stampin’ Up! Kit Collection today and start creating!
All products are available on my ONLINE STORE (links below).
Join my TEAM and organize a workshop around this quick and easy project today!
Happy crafting!
Blessings, Kat
The Kit Collection
Happy Houseplant Kit
$25.00 for four projects
Take It To the NEXT LEVEL
Video Tutorial
Supply List:
Here are some of the featured products that are available on my ONLINE store…so convenient — just click and it will ADD TO YOUR CART below:
I wanted to mark my Mother’s milestone — her 90th birthday with a special handmade card crafted with love and adorned with the exquisite Flowering Zinnia suite of products. This is a new collection that spoke to my heart when I first saw it since my mother used to fill her gardens with just that…flowering zinnias. I knew it would make a connection with her as well.
This exclusive collection from Stampin’ Up! features stunning designer series paper, versatile dies for creating intricate flowers, and sparkling embellishments, allowing you to create a truly unforgettable card for anyone’s special day.
Designer Series Paper Delights: The Flowering Zinnia suite offers a range of Designer Series papers featuring vibrant floral patterns and elegant designs. Each sheet is a work of art, perfect for adding a touch of beauty and sophistication to any project. Choose from a variety of patterns to suit your style and preferences, ensuring a personalized and heartfelt project.
Versatile Dies for Creative Freedom: With the Flowering Zinnia dies, you have the power to build intricate flowers and leaves adding dimension and elegance to your card design. These quality dies are designed to effortlessly cut through cardstock and are perfect for the MINI Stamp & Emboss Machine, allowing you to create stunning embellishments that will dazzle and delight. Let your creativity bloom as you experiment with different combinations of colors like Real Red, Sweet Sorbet, and Calypso Coral card stock.
Sparkling Embellishments for a Touch of Glamour: To add a touch of glamour and sophistication to your project, the Flowering Zinnia suite offers sparkling embellishments that are sure to catch the eye. The Adhesive Backed Shiny Sequins are perfect to add subtle sparkle and a luxurious finishing touch to your design, making your card truly shine.
Crafting a Special Birthday Card: To craft my special 90th birthday card for my mother, I started by selecting a perfect designer series paper favorite from the Flowering Zinnia suite. I used the versatile dies to create beautiful flowers and went through my crafting stash to find the Number of Years stamps set and Large Number Dies (both retired) to create the center medallion from Holographic Speciality Paper using the Thoughtful Expressions layering dies. I embellished my design with sparkling embellishments for a touch of glamour. I added a heartfelt message to convey my love and best wishes on this momentous occasion. Please watch the VIDEO TUTORIAL for all the project details!
Shop Online for Convenience: To explore the full range of products in the Flowering Zinnia suite and start creating your special birthday card, shop online through the link below. Your purchase will be delivered directly to your door, allowing you to craft with ease and convenience.
Celebrate your mother’s 90th birthday or any birthday in style with a handmade card crafted with love and adorned with the exquisite Flowering Zinnia suite of products. Let your creativity bloom as you create a card that is as beautiful and unique as she is.
Wishing my Mother a happy 90th birthday … and to all our Moms a year filled with love, joy, and beautiful memories for those that have passed.
Blessings, Kat
Products Featured
FLOWERING ZINNIAS SUITE COLLECTION:
Simply Zinnia stamp/bundle
Zinnia 3D Embossing Folder
Adhesive Backed Shiny Sequins
Flowering Zinnias 12″ x 12″ Designer Series Paper (DSP)
Holographic Speciality Paper Layer
PAPER BUTTERFLY ACCENTS
Color with coordinating Stamping Blends
Stampin’ TRIMMER
Stampin’ Emboss & Die Cut Machine
TAKE A PICK TOOLS
Both mini & regular Dimensions
Video Tutorial
Project PDF
FREE with Purchase. My customers get ALL PDFs for FREE. Includes all measurements and a paper template.
Featured Products & ON-LINE STORE:
Here are some of the featured products that are available on my ONLINE store…so convenient — just click and it will ADD TO YOUR CART below:
ONLINE EXCLUSIVES – Elevate Your Crafts with the Flowering Zinnias Suite Collection
Looking to infuse your crafts with vibrant floral beauty? GET READY for the Flowering Zinnias Suite Collection! This stunning collection is a fantastic choice for adding a touch of nature’s beauty to your creations. From colorful paper to intricate floral die cuts, stamps, and sparkling embellishments, this collection offers a myriad of creative possibilities for any occasion.
One of the standout features of the Flowering Zinnias Suite Collection is its versatility. The colorful paper serves as the perfect backdrop while the floral die cuts and stamps allow you to add intricate floral details with ease. The TOP/BOTTOM flower pattern is perfect for combining with the Sweet Thoughts Memories & More Card bases since they fit perfectly as a front layer (no waste) and the colors coordinate beautifully!
STEP IT UP! Add sentiments with the Thoughtful Moments Hybrid Embossing Folder and Dies, combined with the Sweet Thoughts Memories & More Cards & Envelopes; these pre-made cards and envelopes not only save you time on prep work but also coordinate beautifully with the Flowering Zinnias Suite Collection. This means you can easily create stunning handmade cards without the hassle of matching colors and designs.
To inspire you, check out my gallery of cards using the Flowering Zinnias Suite Collection which showcases some creative possibilities and offers ideas for other products that coordinate easily — Paper Butterfly Accents, Thoughtful Moments Hybrid sentiments, Vellum, Metallic Embossing Powder, 3D Basics Embossing Folders, Timeless Arrangement Dies, Stampin’ Blends.
The Flowering Zinnias Suite Collection is a must-have for any crafter looking to add a touch of floral beauty to their creations. With its vibrant colors, intricate designs, and endless creative possibilities, this collection is sure to elevate your crafts to new heights.
All products are available on my ONLINE STORE (links below).
If you are looking for a DEMONSTRATOR — please join my TEAM!
Happy crafting!
Blessings, Kat
Card Gallery
EASY CRAFTING
Use the Sweet Thoughts Memories & More Card Pack for easy base cards!
The 12″ x 12″ DSP cuts 6 perfect laying pieces measuring 6″ x 4″ that make your card making a breeze!
Supply List & Measurements Used for this Project
FLOWERING ZINNIAS SUITE COLLECTION:
Simply Zinnia stamp/bundle
Zinnia 3D Embossing Folder
Adhesive Backed Shiny Sequins
Flowering Zinnias 12″ x 12″ Designer Series Paper (DSP)
SWEET THOUGHTS MEMORIES & MORE CARDS & ENVELOPES
FLOWER ZINNIAS 12″ X 12″ DSP:
Take the sheet with the pattern of flowers that runs along the top and bottom.
Cut six pieces measuring 6″ x 4″
this size fits perfectly on the M&M card bases!
Basic White – can be used to layering on the 6.25″ x 4 3/8″ card base from the SWEET THOUGHTS MEMORIES & MORE card bases
THOUGHTFUL MOMENTS HYBRID bundle
Use Basic White Card stock (cut 6″ x 6″)
Versamark with the STAMPIN’ BRAYER
Use silver metallic embossing powder to create the 3D lettering effect
PAPER BUTTERFLY ACCENTS
Color with coordinating Stamping Blends
LAYERING DECKLED CIRCLE DIES
TIMELESS ARRANGEMENT DIES
Stampin’ TRIMMER
Stampin’ Emboss & Die Cut Machine
TAKE A PICK TOOLS
Both mini & regular Dimensions
Featured Products & ON-LINE STORE:
Here are some of the featured products that are available on my ONLINE store…so convenient — just click and it will ADD TO YOUR CART below:
Elevate Your Card Crafting with a Rock Star Twist: Center Panel Easel Card Tutorial
Get ready to rock with a project that takes inspiration from Dawn Griffith’s Center Panel Easel Card while infusing a burst of musical energy. I’ve embraced the Stampin’ Up! ROCK LEGEND KIT, a treasure trove containing supplies for 8 cards with envelopes, and elevated it to new heights. Join me on this creative journey as I guide you through a step-by-step tutorial demonstrating how to craft a show-stopping center panel easel card that’s sure to impress.
Unlock the Power of Stampin’ Up!’s ROCK LEGEND KIT: The ROCK LEGEND KIT from Stampin’ Up! is not your average card-making kit. Packed with premium materials and vibrant designs, it provides everything you need to create 8 stunning cards with matching envelopes. From bold graphics to musical motifs, this kit captures the essence of a rock concert, making it the perfect starting point for our innovative project.
Center Panel Easel Card Tutorial: In my tutorial, I’ll reveal how to transform the contents of the ROCK LEGEND KIT into a mesmerizing unique card design that adds a dynamic and unexpected element to your crafting repertoire.
Pop-Up Delight with Musical Accents: The real magic of this project lies in the interactive design is a clever folding mechanism. When the center panel is lifted, watch as the guitar and drumsticks pop up, creating a 3D effect that is bound to delight any recipient. It’s a musical surprise that adds an extra layer of charm to your handmade card.
Perfect for All Occasions: Though the card includes birthdays and congratulations sentiment — you can add anything using stamps from your crafting stash. By using the ALPHABEST bundle you can add more dimension to what the card kit offers. Add a name for a personalized touch paired with the rock and roll theme ensures that your creation will be remembered long after it’s received.
Spread the Love, and Share the Tutorial: Crafting is more enjoyable when shared, and I encourage you to spread the love by sharing this tutorial with fellow crafting enthusiasts. Together, let’s inspire creativity and bring the joy of handmade cards to as many people as possible.
Elevate your card-making experience with this unique twist on the center panel easel card, inspired by the ROCK LEGEND KIT from Stampin’ Up! Join me in the tutorial, embrace the musical vibes, and create a card that not only rocks but also pops up with surprise and delight. It’s time to let your creativity take center stage – let the crafting concert begin!
All products are available on my ONLINE STORE (links below). And if you love the ROCK-N-ROLL vibe….consider the Rock n’ Roll SUITE COLLECTION!
If you are looking for a DEMONSTRATOR — please join my TEAM under SALE-a-BRATION!
Happy crafting!
Blessings, Kat
Easy Center Panel Easel Cards
Supply List & Measurements Used for this Project
STAMPS / Bundles :
ALPHABEST stamp
Best Label Punch
CARDSTOCK from the ROCK LEGEND KIT :
Basic White – for stamping “hey”
Panel Pieces:
Need two cut @ 1.25″ x 4″ for side panel
Need two cut @ 2.25″ 1 7/8″
Using the envelop paper E
TAKE Basecard from the ROCK LEGEND KIT
Using Trimmer cut top (5.5″ edge along the top)
1.5″ from LEFT
4″ along RIGHT
Stamp “hey” using the ALPHABEST stamps
Outline stamped in CRUSHED CURRY ink
Letters stamped in REAL RED ink
Punch shapes
INKS:
Crushed Curry
Real Red
Stampin’ TRIMMER
TAKE A PICK TOOLS
Both mini & regular Dimensions
Video Tutorial
Featured Products & ON-LINE STORE:
Here are some of the featured products that are available on my ONLINE store…so convenient — just click and it will ADD TO YOUR CART below:
Discover the art of heartfelt crafting with the Mini Catalog’s exclusive bundle featuring the Adoring Hearts collection, Layered Florals 3D Embossing Folder, Lifetime of Love Bundle, and the exquisite designer series paper from Country Side Inn and Poetic Expressions 12″ x 12″ Designer Series Paper.
Create stunning “turn and fold” cards that will captivate for Valentines, Weddings, Birthdays, and Mother’s Day! The Adoring Hearts bundle brings romance to life with intricate heart designs, complemented by the textured beauty of the Layered Florals 3D Embossing Folder.
Personalize your creations with sentiments and embellishments from the Lifetime of Love Bundle, Thoughtful Expressions Dies.
I have added additional inspiration with cards made using the DSP patterns from the Countryside Inn, Poetic Expression, Sofly Stippled, and Flight & Airy 12 x 12 Designer Series Paper (DSP). Make every card a cherished work of art with these exquisite pattern coordinations!
Don’t miss the exclusive opportunity to receive a GIFT from me when you make a $75 purchase from my ONLINE Store during SALE-A-Brations.
Remember, let your creativity flow. Don’t be afraid to experiment with different color combinations and placements until you find the perfect look!
All products are available on my ONLINE STORE (links below).
If you are looking for a DEMONSTRATOR — please join my TEAM under SALE-a-BRATION!
Happy crafting!
Blessings, Kat
Easy Turn & Fold Cards
Turn & Fold Card featuring Poetic Expressions DSP
Featuring the COUNTRYSIDE INN DSP
Featuring the SOFTLY STIPPLED DSP
FREE during SALE-A-BRATIONS
Featuring the FLIGHT & AIRY DSP —
FREE during SALE-A-BRATIONS
Supply List & Measurements Used for this Project
STAMPS / Bundles / Embossing Folder :
Adoring Hearts
Thoughtful Expressions
Deckled Circle Dies
Lifetime of Love
Heartfelt Hellos stamp set
Adoring Hearts Hybrid Embossing Folder
Layered Florals 3D Embossing Folder
CARDSTOCK:
Basic White – A2 Card (Base)
Adoring Heart Pieces:
Basic White – 6″ x 6″ square
Emboss with Versamark Ink
Apply SILVER Embossing powder, use HEAT TOOL and cut with DIE to create “adoring hearts” as embellishments
Center Medallion –
Basic White 4″ square to cut two filagree that are layered with DISTRESS MEDIUM
Boho Blue – cut 2 using Deckled Circle for Base and layer
Silver Embossed “adoring heart” for center
Origami Fold – 8″ x 8″ Basic White scored to create twelve 2″ squares
Score 2″ & 6″ all around
Score at 4″ to first score line all around
create middle square
use a METAL RULER, a STAMPIN’ Pierce Mat, and a SCORING tool to connect a 4″ line diagonally across each side (see video) to create a diamond shape
Basic White Cardstock – Center “diamond” for sentiment – 2.5″ x 2.5″ square
Boho Blue cardstock:
Layer (5 1/4″ x 4″) for front of card
Belly Band cut 1.5″ x 11″
Score 3.5″ and 7 3/16″
12″ x 12″ Designer Series Paper (DSP)
Countryside Inn DSP
Poetic Expressions DSP
You need three coordinating patterns:
Pattern One: need 4 squares each cut 1.75″ square
Pattern Two: need 4 squares each cut 1.75″ square
Pattern Three: need 2 squares each cut 1.75″ square and then cut diagonally to form triangles
Use 4 “adoring hearts” as embellishments
Use non-directional cardstock for the corner pieces
Sale-a-brations FREE PAPER ideas:
Most Adored DSP,
Flight & Airy DSP,
Softly Stippled DSP
INKS:
Boho Blue
Night of Navy
Versamark Ink and SILVER Embossing Powder
Stampin’ TRIMMER
Stampin’ Cut & Emboss Machine
Heat Tool
TAKE A PICK TOOL
Fine Tip Pen — to pen directions on Basic White Card Stock
DISTRESS Collage Medium (matt) for layering
VELCRO circles made for crafting (AMAZON)
Video Tutorial
Featured Products & ON-LINE STORE:
Here are some of the featured products that are available on my ONLINE store…so convenient — just click and it will ADD TO YOUR CART below:
Elevate your card-making experience with the Bee Mine Suite collection, designed to infuse fun and engagement into your creations. Unlock the next level of creativity by incorporating whimsical wobbles and crafting captivating spinner cards.
Join me as I demonstrate just how effortlessly you can transform your projects. I’ll share invaluable tips and tricks on maximizing the potential of the BEE MINE suite, guiding you through the seamless process of building a mesmerizing spinner mechanism. Let’s turn your card-making journey into a delightful and interactive masterpiece!
Stamp ART Connection passionately advocates for the joy of crafting with a heartfelt mission: “Make a card, give a smile.” Aligned with Stampin’ Up!’s profound Statement of the Heart, we embrace the ethos of “loving what we do and sharing what we love.” Our purpose extends beyond personal creativity, aiming to inspire others and contribute to meaningful accomplishments. In the spirit of making a difference, we believe in the power of one card at a time. Consider making fun cards for donating this Valentine’s…share the love.
The key to a successful DIY project is to let your creativity flow. Don’t be afraid to experiment with different color combinations and placements until you find the perfect look that captures the essence of your affection.
All products are available on my ONLINE STORE (links below). If you are looking for a DEMONSTRATOR — please join my TEAM under SALE-a-BRATION!
Happy crafting!
Blessings, Kat
Bee Mine Wobble Card!
BEE MINE Spinner Card!
Supply List & Measurements Used for this Project
STAMPS / PUNCHES :
Bee Mine Valentine Bundle
1″ Circle Punch
Curved Label Punch
CARDSTOCK:
Sweet Sorbet (Base)
BASIC WHITE cardstock Layer (5 1/4″ x 4″)
Bee Mine 12″ x 12″ Designer Series Paper (DSP) (5″ x 3 3/4″)
Spinner Mechanism
Window Sheet (acetate)
Adhesive “dots” (medium size)
One Cent Piece (Penny)
Multi-Purpose Adhesive Strips
INKS:
MEMENTO BLACK
SWEET SORBET
DAFFODIL DELIGHT
EMBELLISHMENTS:
ADHESIVE BACKED HEARTS & FLOWERS
Stampin’ TRIMMER
WINK OF STELLA (optional for wings)
TAKE A PICK TOOL
Video Tutorial
Featured Products & ON-LINE STORE:
Here are some of the featured products that are available on my ONLINE store…so convenient — just click and it will ADD TO YOUR CART below:
Valentine’s Day is just around the corner, and what better way to express your love than with a handmade touch? Transform the Bee Mine Square Pillow boxes into delightful gifts that truly stand out. Join me as I share two fantastic coloring techniques that will add a touch of pizzazz to your Valentine’s presents, featuring the charming “Bee Mine” Suite Collection.
To start, gather your Bee Mine 12″x12″ DSP and choose a color scheme that resonates with the Valentine’s theme. Using the brayer technique, paint onto the Bee Mine Square Pillow boxes. Using the Bee Mine Stamp set – use coordinating colors to personalize the design.
Sweet Sorbet Accents – Integrate the Sweet Sorbet Bordered Ribbon into your design to add texture and a pop of color. Wrap the ribbon around the pillow box, creating a lovely border or bow. This not only enhances the visual appeal but also provides a tactile element to your gift. Experiment with different ribbons such as Gingham and Pool Paper ribbon and find the perfect combination that suits your style.
Adhesive-Backed Hearts & Flowers – No Valentine’s Day gift is complete without some heartfelt embellishments. The Adhesive-Backed Hearts & Flowers from the “bee mine” Suite Collection are perfect for this. Strategically place these charming details on your pillow box tags to create a romantic and whimsical look. The adhesive backing ensures a secure attachment, making it easy to achieve a polished finish.
Share the Love – Once you’ve applied these two coloring techniques and added the delightful accessories from the “bee mine” Suite Collection, your Bee Mine Square Pillow boxes will be ready to spread joy and love on Valentine’s Day. Whether you’re gifting to a significant other, a friend, or family member, these personalized creations will surely make their heart skip a beat.
Remember, the key to a successful DIY project is to let your creativity flow. Don’t be afraid to experiment with different color combinations and placements until you find the perfect look that captures the essence of your affection.
All products are available on my ON LINE STORE (links below). If you are looking for a DEMONSTRATOR — please join my TEAM!
Happy crafting!
Blessings, Kat
Bee Mine Square Pillow Boxes “extraordinaire“!
Supply List & Measurements Used for this Project
STAMPS / PUNCHES :
Bee Mine Valentine Bundle
2 3/8″ Circle Punch
Heart Punch (retired)
CARDSTOCK:
SQUARE PILLOW BOXES (pack of 10)
THICK BASIC WHITE cardstock
Bee Mine 12″ x 12″ Designer Series Paper (DSP)
Sizes & Dimensions:
6″ diameter DSP
Cover with MULTIPURPOSE ADHESIVE SHEET
Use a TAKE A PICK craft knife to cut excess
Coloring:
STAMPIN’ BRAYER
INKS: MEMEMTO BLACK, SWEET SORBET, DAFFODIL DELIGHT, POOL PARTY
VERSA MARK Ink
BLACK EMBOSSING POWDER
STAMPIN’ WRITE MARKER: BLACK
EMBELLISHMENTS:
ADHESIVE BACKED HEARTS & FLOWERS
BORDERED RIBBON (from the Bee Mine Collection)
CRINKLED RIBBON (Pool Party)
GINGHAM RIBBON (1/4″)
Stampin’ TRIMMER / Scoring Tool
WINK OF STELLA (for wings)
TAKE A PICK TOOL
Video Tutorial
Featured Products & ON-LINE STORE:
Here are some of the featured products that are available on my ONLINE store…so convenient — just click and it will ADD TO YOUR CART below:
Crafting a Memorable New Year’s Day: A His and Her Project Inspired by Maymay Made It and featuring Stampin’ Up!’s DAYS TO REMEMBER stamp set
As we ushered in the New Year, I embarked on a creative endeavor inspired by the innovative crafting techniques of Maymay Made It Crafts. This special project was crafted for a dear colleague, SCI-FI author Marvin Merritt II. The goal was to create a “his and her” calendar set designed to appeal to both masculine and feminine sensibilities. My project features a SPECIAL TECHNIQUE for creating the monthly calendars that conveniently “pull off”!
For this project, I chose to showcase both current and retired Stampin’ Up! products and include Stampin’ Up!’s ‘Days to Remember’, ‘Wonderful Thoughts’, and ‘On the Ocean’ stamp sets, complemented by the retired ‘Number of Years’ Large Numbers Framelits dies. To add a touch of elegance, the project incorporates the ‘Delightful Floral’ Designer Series Paper (DSP), bringing a burst of color and pattern to the creation. I also include ‘CORK Speciality Paper’ & ‘IN GOOD TASTE DSP’ — both retired favorites from my crafting stash.
Step-by-Step Demonstration: I’ve created a detailed video tutorial with step-by-step instructions to guide you through the entire process, from selecting and coordinating materials to executing each detail. Whether you’re a seasoned crafter or just starting, the tutorial is crafted to be accessible and inspiring.
Don’t Forget to Shop Online: To make your crafting experience even more convenient, I’ve provided links below the video for online shopping of the featured Stampin’ Up! products. This allows you to easily access my online store.
Your support helps sustain the creation of more inspiring content!
Wishing You a Happy New Year: As we embark on another chapter, I extend my warmest wishes for a Happy New Year to all my readers and fellow crafters. May the upcoming months be filled with creativity, joy, and countless crafting adventures. Your support and engagement mean the world to me.
Don’t Forget to Like and Leave a Comment: Your feedback is invaluable to me. If you enjoyed the project or have any thoughts to share, don’t forget to hit the ‘Like’ button and leave a comment. I love hearing from you!
Lastly, in the spirit of creativity and celebration, let’s kick off the New Year with a crafting project that brings joy and inspiration. I hope this project sparks your creativity and adds a touch of handmade charm to your New Year! Happy crafting!
Blessings, Kat
2024 Desk Top Easel Calendar
For Her
Supply List & Measurements Used for this Project
STAMPS / DIES:
Days to Remember
Wonderful Thoughts (sentiment)
On the Ocean (sentiment)
Translucent Florals (accent)
Large Numbers Framelits Dies (140622-retired)
CARDSTOCK:
Light cardboard (from the DSP paper packs) OR use THICK BASIC WHITE cardstock
Delightful Floral 12″ x 12″ Designer Series Paper (DSP)
Cork 12″ x 12″ Speciality Paper (156393 – retired)
In Good Taste DSP
Parakeet Party Card Stock
Calypso Coral Card Stock
Basic White (for sentiment)
Sizes & Dimensions:
Base: 4 1/4″ x 11″ (Light Cardboard or THICK Basic White card stock)
CALENDAR: 4 1/4″ x 5 1/2″
Cover with MULTIPURPOSE ADHESIVE SHEET (both sides)
Select DSP and apply it to each side/use a craft knife to cut excess
After the sides have been covered refer to the video to score at 5.5″ and 2.75″ to create the easel folds
Coloring: After images are stamped in MEMEMTO BLACK ink color using Stampin’ Blends:
Stampin’ TRIMMER / Scoring Tool
Cosmic Shimmer Acrylic Glue and Beacon 3-n-1 Craft Glue
Stampin’ Cut & Emboss Machine
Stampin’ Up Corner Hardware (retired)
Foam Adhesive Sheets (for numbers)
Video Tutorial
Featured Products & ON-LINE STORE:
Here are some of the featured products that are available on my ONLINE store…so convenient — just click and it will ADD TO YOUR CART below:
Crafting Joy: DIY Christmas Ornament with Stampin’ Up!’s Shop the Town Bundle
Inspired by HGTV’s annual “DECORATING THE WHITE HOUSE” episode for 2023 — artisans created holiday dioramas of American cities as ornaments for the annual White House Christmas Tree which is the centerpiece of the Blue Room. Using the Shop the Town and Let’s Go Shopping bundle I created a similar project for this holiday season. This is the perfect time to unleash your creativity add a personal touch to your festive decorations and be inspired by everything around you!
This project features Stampin’ Up!’s delightful Shop the Town, Trucking Along, and Let’s Go Shopping bundle. Follow my video tutorial for a step-by-step demonstration of creating this project.
Don’t forget to shop ONLINE products below! Wishing you a MERRY crafting Season! Blessings to you and your family this holiday season! Thank you for sharing the year with me! Don’t forget to LIKE and leave a comment!
Blessings, Kat
Shop the Town Christmas Ornament
Additional Inspiration
Supply List & Measurements Used for this Project
STAMPS / DIES:
Shop the Town
Let’s Go Shopping Bundle
Trucking Along Bundle
Horse and Sleigh Dies
Pine Woods Dies (retired)
CARDSTOCK:
Basic White
TREES: Old Olive, Mossing Meadow
Sizes & Dimensions:
Base: 3.5″ X 7″ (recommend THICK card stock)
Snow Drift: 10″ x 1.5″
Score @ 1.5″ and 7″ to fit around the back side of the Frame
Platform: 4″ x 8″ (double regular cardstock or use THICK card stock)
Frame (refer to earlier VIDEOS) linked in this Video:
two pieces cut 7 x 2.5″ and 3.5″ x 2.5″ each
SCORE along the SHORT edge: .5″, 1″, 1.5″, 2″
Shortest piece – SCORE along the LONG edge .5″ and 2″ to the FIRST score line only (this creates the mitered corner for the frame)
Use BONE FOLDER, fold and cut 1/8″ from the longest edge
Folder and glue to form TUBES
Coloring: After images are stamped in MEMEMTO BLACK ink color using Stampin’ Blends:
BUILDINGS – GREY GRANITE, SMOKEY SLATE, POOL PARTY, BALMY BLUE, DAFFODIL DELIGHT, GRANNY APPLE GREEN (WREATHS)
TREE: GRANNY APPLE GREEN (BASE COLOR) AND MOSSY MEADOW, DAFF DELIGHT
CAROLERS: DAFF DELIGHT, BALMY BLUE, CALYPSO CORAL (SKIRT), POOL PARTY, DARK SMOKEY SLATE (BOYS PANTS), GRANNY APPLE GREEN, REAL RED (SHOES, HATS), SU900 FOR FLESH TONES.
Stampin’ TRIMMER / Scoring Tool
Fine Tip Glue (also used Cosmic Shimmer and Beaon 3-n-1 Craft Glue)
Stampin’ Cut & Emboss Machine
Stampin’ Up! Clear & Gold Embossing Powder
Glimmer Paper for truck window
Distress ROCK CANDY clear glitter
DecoArt Snow-Tex for snow texture (you can also SHIMMER Embossing Paste)
Stampin’ Up Enamel Effects
Metallic
Pearlized
Video Tutorial
Featured Products & ON-LINE STORE:
Here are some of the featured products that are available on my ONLINE store…so convenient — just click and it will ADD TO YOUR CART below:
Join me as I demonstrate step-by-step how to create delightful Gingerbread Gift Boxes by using a combination of various current and retired STAMPIN’ Up! products, as well as items easily found at your local craft store or in the baking aisle of your favorite supermarket. Get ready to unleash your creativity as I guide you through the process, from collecting products, and cutting the cardstock to assembling and decorating the final gift boxes.
The key features of this Gingerbread Gift Box Project are the Pearlized and Metallic Enamel Effects and the Shimmery White Embossing Paste on SU card stock (Cinnamon Cider / Pecan Pie / Copper Clay / Fresh Freesia / Moody Mauve).
I provide detailed instructions and helpful tips as well as showcase a variety of techniques using the versatile STAMPIN’ Up! products specifically designed to add an extra touch of charm to your gift boxes with PEARLIZED OR METALLIC ENAMEL EFFECTS, SHIMMERY WHITE EMBOSSING PASTE, festive ribbons, and glittered embellishments, you’ll discover endless possibilities to customize your creations.
But don’t worry if you don’t have access to retired STAMPIN’ Up! products, as I also suggest alternative items. You’ll be surprised at how creative you can get with items you already have in your craft room.
Allow me to guide you on how to create handmade gift boxes for your loved ones or simply enjoy a fun craft activity. Join me on an exciting journey as we bring some gingerbread magic into your life. Let’s get started!
Don’t forget to shop ONLINE products below! Wishing you a MERRY crafting Season!
Gingerbread Gift Box
Additional Inspiration
Supply List & Measurements Used for this Project
STAMPS / DIES:
POP on BY Bundle (stamps & dies) Retired (Stamps 146641 / Thinlet Dies 146829)
CARDSTOCK:
Cinnamon Cider (retired)
Pecan Pie
Copper Clay (roof)
Fresh Freesia
Moody Mauve (roof)
Sizes & Dimensions:
two pieces cut 7 5/8 x 10 1/2 ” for gift box
two pieces cut 4 1/4″ x 3 3/8″ using darker color card stock for the roof
SCORE:
Along the 7″ side score: 2 7/8, 7 1/8″
Along the 10″ side (with the 1/4″ tab at the bottom)
Score: 2 7/8″, 7 1/8, 10″
CUT: Follow the VIDEO tutorial
Stampin’ TRIMMER / Scoring Tool
Multi-Purpose Glue (TOMBOW / Fine Tip Glue)
Stampin’ Cut & Emboss Machine
Stampin’ Up! Shimmery White Embossing Paste
MASKS / STENCIL
Glimmer Paper
BASIC WHITE CARD STOCK
Stampin’ Up Enamel Effects
Metallic
Pearlized
Video Tutorial
Featured Products & ON-LINE STORE:
Here are some of the featured products that are available on my ONLINE store…so convenient — just click and it will ADD TO YOUR CART below:
Title: The Holiday Horse & Sleigh Meet the Never-Ending Card
Are you ready to immerse yourself in the enchanting spirit of the holiday season? Picture this: a cozy winter’s evening, a horse-drawn sleigh gliding through a snow-covered landscape, and a magical surprise waiting for you. Allow me to introduce you to the extraordinary combination of the Holiday Horse & Sleigh and the captivating Never-Ending Card.
The Holiday Horse & Sleigh Bundle is a timeless symbol of festive charm. Imagine a scene nestled under a warm blanket, feeling the crisp winter air as the gentle jingle of sleigh bells fills the air. The majestic horse pulling the sleigh creates a mesmerizing holiday scene to immerse recipients in the nostalgia of traditional winter celebrations.
The Never-Ending Card adds a touch of whimsy and intrigue to this delightful scene using the ONE-HORSE OPEN SLEIGH 6″x 6″ Designer Series Paper. Crafted with ingenuity, the Never-Ending Card is a marvel of paper engineering. As you open it, it reveals a series of folds and surprises, continuing endlessly in an infinite loop. Each fold unravels a new scene, telling a story of holiday wonder and joy that captivates all who encounter it.
The combination of the Holiday Horse & Sleigh and the Never-Ending Card makes it a perfect card that also stands up and will add to anyone’s holiday décor.
Follow my Video Tutorial, where I demonstrate several ways to color using both STAMPIN’ BLENDS and WATERCOLOR PENCILS. I also show you how to take advantage of the DSP to create wonderful winter scenes! Embrace this delightful pairing and unlock the possibilities of a holiday season filled with wonder, warmth, and endless joy.
Shop the collection below! Happy crafting!
Card 1: Winter Flurries
Card 2: Snow and Ice
Card 3: Winter Branches
Card 4: Winter Slope
Supply List & Measurements Used for this Project
STAMPS / DIES:
HORSE & SLEIGH BUNDLE (stamps & dies)
DECKLED RECTANGLES (for sentiments)
CARDSTOCK:
ONE HORSE OPEN SLEIGH 6″x6″ Specialty Designer Series Paper
BASIC WHITE CARD STOCK
BASIC BLACK CARD STOCK
REAL RED / CHERRY COBBLER
TRADITIONS OF ST. NICK 12″X12″ SPECIALTY DESIGNER SERIES PAPER
SILVER FOIL 12″X12″ SPECIALITY PAPER
INK:
MEMENTO BLACK (for coloring with Stampin’ Blends)
STAZON (for coloring with watercolor)
VersaMark to emboss with WHITE embossing powder
MISC:
Loose Gems
Watercolor Pencils: Real Red, Cherry Cobbler, Crushed Curry, Cajun Craze, Granny Apple Green, Garden Green, Pecan Pie, Early Espresso, Basic Black
Flesh Color: SU1000 (Stampin’ Blends)
Stampin’ Blends: Smokey Slate, Calypso Coral, Black, Real Red, Balmy Blue, Cherry Cobbler, Pecan Pie
NEVER ENDING CARD – FRONT PANEL:
Basic White – 6″ X 6″ (cut two)
Cut each to 3″ x 6″
Score along the 6″ edge: 1.5″ and 4.5″ DSP – 5″ x 3.75″
You should have 4 pieces measuring 3″ x 6″
Assemble according to AUTUMN LEAVES VIDEO with TEAR TAPE (link below)
https://youtu.be/bbiMwUVQWK8
DSP Pieces: (these are dimensions — choose the DSP Scene to match your own design and follow the video)
four cut 3.75″ x 1.25″ from DSP
two cut 2.75″ square DSP
SECOND PANEL (open):
two pieces cut 2.75″ from DSP
two pieces cut 2.75″ x 1.25″
four pieces cut 1.25″ square
THIRD PANEL:
cut four from DSP 1.25″ square for the corners
the two center panels are 1.25″ x 2.75″
BACK PANEL: two pieces 2.75″ square (Basic White for note is 2.5″ square)
four pieces cut 2.75″ x 1.25″ long
Coordinate with DSP and cardstock
Stampin’ TRIMMER / Scoring Tool
Multi-Purpose Glue (TOMBOW / Fine Tip Glue) / Tear Tape
Mini & Regular Dimensional(s)
Stampin’ Cut & Emboss Machine
Heat Gun
Video Tutorial
Featured Products & ON-LINE STORE:
Here are some of the featured products that are featured in the new catalog and available on my ONLINE store…so convenient — just click and it will ADD TO YOUR CART below:
More Ideas
Use all the winter holiday scenes to create traditional 5.5″ x 4.25″ cards!
Once upon a time, there was a magical forest of Stampin’ Up! known for its vibrant display of colors during the fall season.
In the heart of the forest, stood a majestic oak tree. Its branches stretched out in all directions, adorned with leaves that shimmered in shades of Copper Clay, Moody Mauve, Mossy Meadow, and Pretty Peacock.
One crisp autumn morning, a group of paper crafters decided to explore the depths of the enchanted forest. They stumbled upon a hidden chest tucked beneath the roots of the oak tree. Curiosity getting the better of them, they opened it to discover a stack of personalized cards crafted with theALL ABOUT AUTUMN Speciality Designer Series Paper (DSP). This 6″x 6″ paper pack was the perfect size for these personalized cards — the 6X6 Never Ending Card.
Intrigued, they opened the first card, revealing a breathtaking scene of trees bursting with fiery hues. As they turned the card panels over, they were surprised to find another panel awaiting their discovery.And so, they discovered the magic of the Never Ending Card, designed to tell a story that seemed to go on forever. Each panel showcased different snippets of autumn and captured the essence of the season.
The sentiments written on each panelwere filled with warmth and gratitude, reminding them of the simple joys that autumn brings. Each card invokes the magic of autumn, the crisp air, and the gentle rustling of leaves. The All About Autumn Suite Collection transports you to the beauty and tranquility of the season. Create the Never Ending Card, and relish each new panel as it tells your story!
Don’t wait! Watch my video tutorial and create your own autumn magic with the Never Ending Card! Scroll through the gallery and explore all the design possibilities.
Shop the collection below! Happy crafting!
Card 1: Autumn Sunlight
Card 2: Autumn Lane
Card 3: Autumn Branches
Card 4: Autumn Harvest
Supply List & Measurements Used for this Project
STAMPS / DIES:
AUTUMN LEAVES BUNDLE (stamps & dies)
CARDSTOCK:
ALL ABOUT AUTUMN 6″x6″ Specialty Designer Series Paper
BASIC WHITE CARD STOCK
PRETTY PEACOCK
MOODY MAUVE
COPPER CLAY
MOSSY MEADOW
OXIDIZED COPPER 12″X12″ SPECIALTY DESIGNER SERIES PAPER
DISTRESSED GOLD 12″X12″ SPECIALITY PAPER
2023-2025 IN COLOR 12″X12″ LUSTER SPECIALITY PAPER
TARTAN FOIL 12″X12″ SPECIALITY DESIGNER SERIES PAPER
VELLUM
INK:
COPPER CLAY
Pretty Peacock
VersaMark to emboss with COPPER embossing powder
MISC:
DISTRESSED TILE 3D EMBOSSING FOLDER
COPPER & & NATURAL RIBBON
ADHESIVE-BACKED SPECKLED DOTS
CARD FRONT PANEL:
Basic White – 6″ X 6″ (cut two)
Cut each to 3″ x 6″
Score along the 6″ edge: 1.5″ and 4.5″ DSP – 5″ x 3.75″
You should have 4 pieces measuring 3″ x 6″
Assemble according to VIDEO with TEAR TAPE
Pieces: (these are dimensions — choose the DSP Scene to match your own design and follow the video)
four cut 3.75″ x 1.25″ from DSP
two cut 2.75″ square DSP
SECOND PANEL (open):
four pieces cut 2.75″ from DSP (foil)
Two for the front and two will slip behind the front panel to share the third panel when opened
four pieces of cardstock (embossed with embossing folder) 1.25″ square
THIRD PANEL:
cut four from cardstock and emboss pieces 1.25″ square for the corners
the center panels were already cut (see previous step)
BACK PANEL: two pieces 2.75″ square (Basic White for note is 2.5″ square)
four pieces cut 2.75″ x 1.25″ long
Coordinate with DSP and cardstock
Alternate by flipping DSP to show foil side
Stampin’ TRIMMER / Scoring Tool
Multi-Purpose Glue (TOMBOW / Fine Tip Glue) / Tear Tape
Mini & Regular Dimensional(s)
Stampin’ Cut & Emboss Machine
Heat Gun
Video Tutorial
Featured Products & ON-LINE STORE:
Here are some of the featured products that are featured in the new catalog and available on my ONLINE store…so convenient — just click and it will ADD TO YOUR CART below: