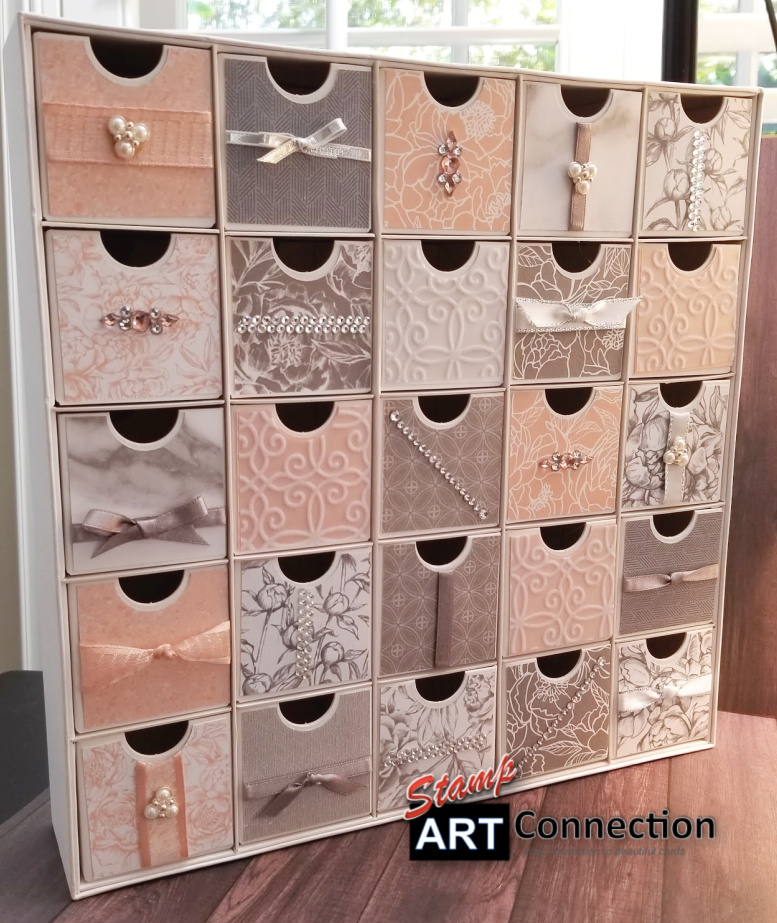
Project Ideas using the Christmas Countdown KIT for Any Occasion — while available ON SALE for $15!

Spread the love!

Purchase the Christmas Countdown KIT during the YEAR END SALE and find inspiration for how to decorate and re-purpose the box for any occasion trinkets, jewelry, office or crafting supplies, and MORE!

Storage Place

Customize the boxes by using your choice of Designer Series Paper and decorate the front and back of the boxes for additional versatility. I used one piece from the KIT to make a template. You can create a storage place that goes with your decor.

Birthday Countdown

Or make fun BIRTHDAY packaging for your favorite little person as a 30 day countdown to the big day?

Deployment Countdown

Is a parent DEPLOYED? Use the 30 day countdown to get the family ready for Mom or Dad’s return from deployment by filling each box with a notes and small gifts to share! There is NO LIMIT what you can do!

I choose to create jewelry boxes for my nieces. I choose a paper pattern, colors and design that would appeal to eaches personality and interests…something they can have fun…something with a touch of whimsy…and with a smile!


UPTOWN GIRL: Peony Garden Designer Series Paper and coordinating ribbons and plenty of bling for my girly girl.
OCEAN LOVER: Whale of a Time Designer Series Paper for my outdoor girl who loves everything about the ocean!
ANIMAL LOVER: Playful Pets Designer Series Paper and coordinating ribbons and trinkets for my pet lover…pets with attitude are perfect to bring a smile.
The Fine Art Floral Designer Series Paper (available 4 January from the new Mini-Catalog) takes it to next level. View my Video Tutorial!

Video Tutorial

Featured Products:


Spread the love!

Social Distancing Through Crafting: Fancy Folds T-Slide Card

Spread the love!

This was a challenging card…but I may have made it harder than it should be. It was definitely a learning experience and I’m anxious to share what I learned.

Some tips: Don’t add DSP to the base card (unless it covers the top layer and there are NO seams). The “t-slide” needs to move smoothly. Recommend using WW THICK cardstock for the top layer. Recommend measuring and centering the “t-slide” and sentiment card strips. The more these pieces are centered — the easier the “t-slide” will move.

Here I focus on making several cards with this technique to include the initial video using the Geared Up Garage set and then a second video featuring the A Good Man stamp set to review nuanced improvements! After viewing both videos, you should be all set to create your own version!


CARD #1: Featuring Geared Up Garage


Video Tutorial for Geared Up Garage


CARD # 2: Featuring A Good Man Stamp Set


Video Tutorial A Good Man


Basic Supplies and Measurements:

  • CARDSTOCK and DIMENSIONS:
  • Base Card: 5 1/4″ square, Layer (for cutting) 5″ square
  • See diagram for CUT and SCORE measurements
  • 3 1/2″ x 1 1/4″ Cardstock
  • 4 1/4″ x 1″ Cardstock
  • 4″ x 1″ Cardstock
  • Additional Cardstock for Card Front
  • TOOLS: Paper Trimmer, Tear Tape, Score Board, Bone Folder, Stamparatus
  • STAMP SET and DIES: Geared Up Garage, A Good Man, Stitched So Sweetly Dies, Layering Circle Dies, Stitched Shapes Framelits
  • INKS: Crumb Cake, Memento Black Ink, Calypso Coral

DIMENSIONS and DIAGRAMS:

Base Card and Front Layer
Diagram of Front Layer for Scoring and Cutting

PRODUCTS FEATURED:

More Card Ideas using Geared Up Garage


Refer to both the T-Slide Video for stamping the paper and the “Fancy Fold Gate Card” to fold the base and create this easy card for Father’s Day!


Spread the love!