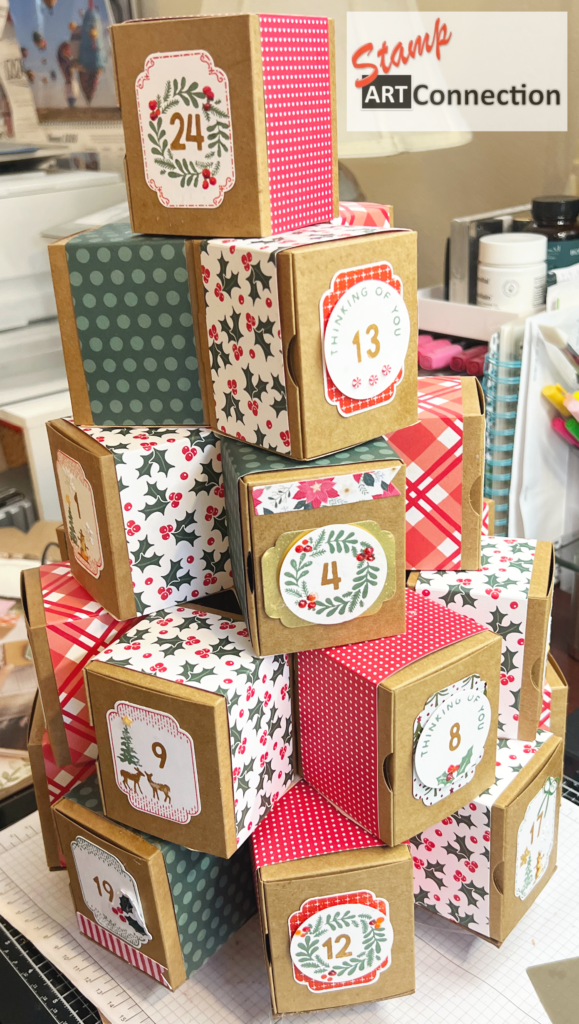
There’s something extra special about counting down the days to Christmas with a handmade Advent calendar—and this one doubles as a beautiful piece of holiday décor!
For this project, I created a free standing Advent Calendar Tree using Stampin’ Up!’s Advent Treat Boxes, Advent Labels Bundle, and Timeless Christmas Designer Series Paper. With 24 individual treat boxes, there’s a little compartment to open every day from December 1 through Christmas Eve.
The best part? Each box can hold a tiny treat, gift, activity, or special message, making this a Christmas tradition you can personalize for just about anyone.
🎄 Featured Stampin’ Up! Products
The stars of this project are:
- Advent Treat Boxes
- Advent Labels Bundle
- Timeless Christmas Designer Series Paper / Neutral Noel DSP
- Snow Front Stamp Set
- Circle Sayings Stamp Set
- Advent Label Punch
- 1-3/4″ Circle Punch
- Glossy Accents
- Enamel Effects
- Holiday embellishments
- Stampin’ Up! cardstock, ink, and adhesives
My Christmas Color Palette
I kept the colors warm and traditional :
❤️ Poppy Parade
🌲 Peaceful Pine
🤎 Pecan Pie
For Neutral Noel DSP: Cherry Cobbler, Mossy Meadow, Crumb Cake and Copper Clay.
These colors coordinate beautifully with the colors & patterns in the Timeless Christmas DSP and help give the finished tree a coordinated look without making every box identical.
✂️ Cutting the Timeless Christmas DSP
Here’s an easy way to calculate exactly how much Designer Series Paper you’ll need.
Each 12″ x 12″ sheet of Timeless Christmas DSP can be cut into six 2″ wide strips.
1 sheet = six 2″ strips
4 sheets = twenty-four 2″ strips
That gives you the 24 strips needed for your 24 Advent Treat Boxes.
Before attaching anything, I recommend laying out all your DSP strips so you can see the colors and patterns together. Alternate the designs throughout the tree rather than placing similar patterns next to each other.
This little bit of planning makes a BIG difference in the finished project!
🏷️ Create 24 Coordinating Advent Labels
Next comes one of my favorite parts—creating all those little numbered Advent tags!
I used the Advent Labels Bundle and Advent Label Punch to create coordinating labels for the individual boxes.
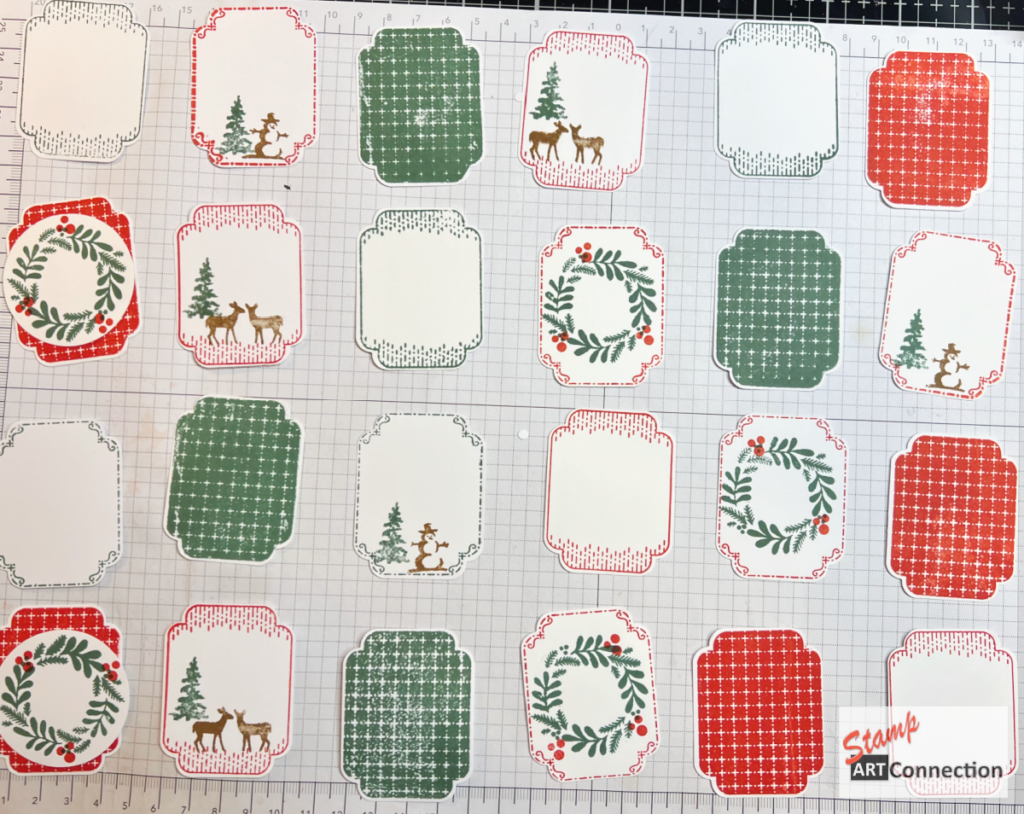
Before assembling the tree, lay out your DSP pattern and color combinations and match each one with a coordinating label. This allows you to balance your Poppy Parade, Peaceful Pine, and Pecan Pie accents throughout the entire tree.
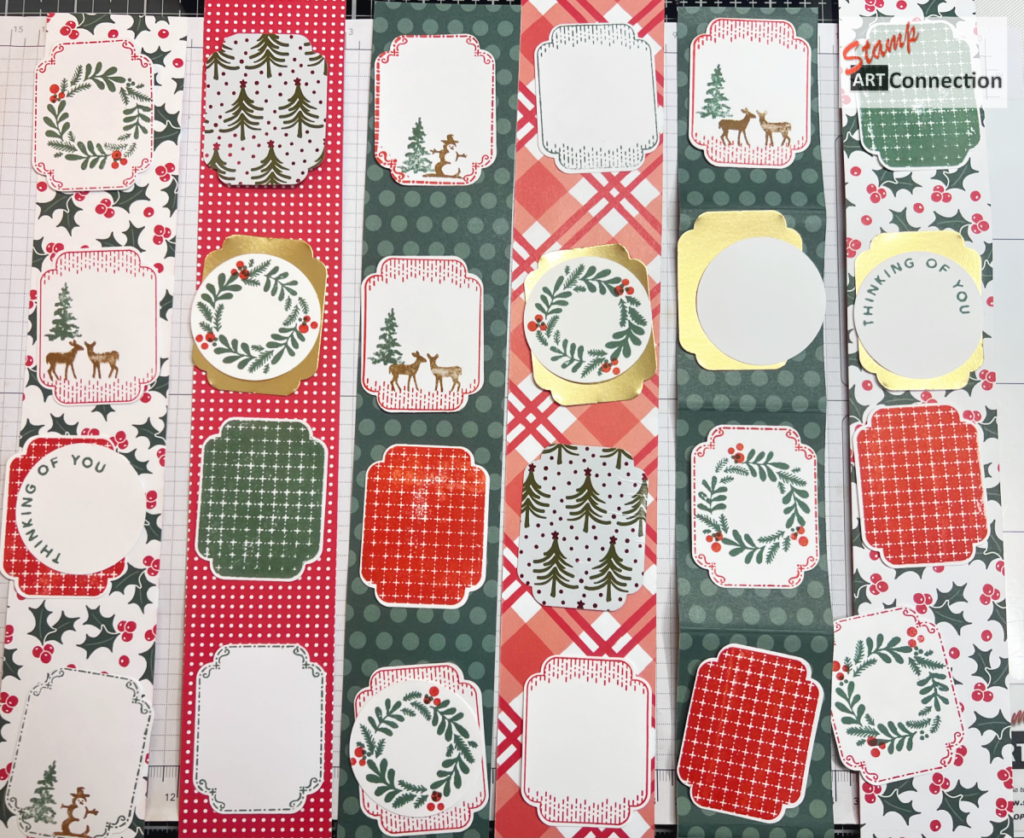
Don’t worry about making every tag exactly the same. Part of the charm is giving each one its own personality!
🌿 Add Wreaths with a 1-3/4″ Circle Punch
I also incorporated wreath images into the design.
After stamping the wreaths, I used a 1-3/4″ Circle Punch to punch them out. The circles make wonderful little decorative elements and coordinate beautifully with the Advent labels.
I also brought in images and sentiments from the Snow Front and Circle Sayings Stamp Sets to give me even more options for decorating the boxes.
This is also a great opportunity to look through the Christmas stamp sets you already own. Mix, match, and make this project your own!
✨ Don’t Forget the Details!
Once all 24 labels are created, have some fun embellishing them.
Products like Glossy Accents and Enamel Effects can add dimension, shine, and texture to otherwise simple stamped images.
And dig into that embellishment stash!
Try adding rhinestones, pearls, metallic accents, sequins, ribbon, twine, snowflakes, or other holiday embellishments to individual tags.
Because each box is small, it only takes a tiny detail to make it feel special.
📐 Creating the Cardboard Tree Structure
With 24 filled and decorated boxes, the Advent Tree needs a sturdy foundation.
I created a cardboard platform starting with a 6″ square and scored it at 1″ to form the base.
For the individual tree layers, use the paper pattern templates as guides to cut the corresponding shapes from cardboard.
The cardboard layers provide the hidden structure and stability needed as you begin stacking and assembling your Advent Treat Boxes into the tree shape.
TIP: Take your time with this part! Before permanently adhering the layers, dry-fit the boxes and cardboard pieces. Check that everything is centered, balanced, and sitting properly.
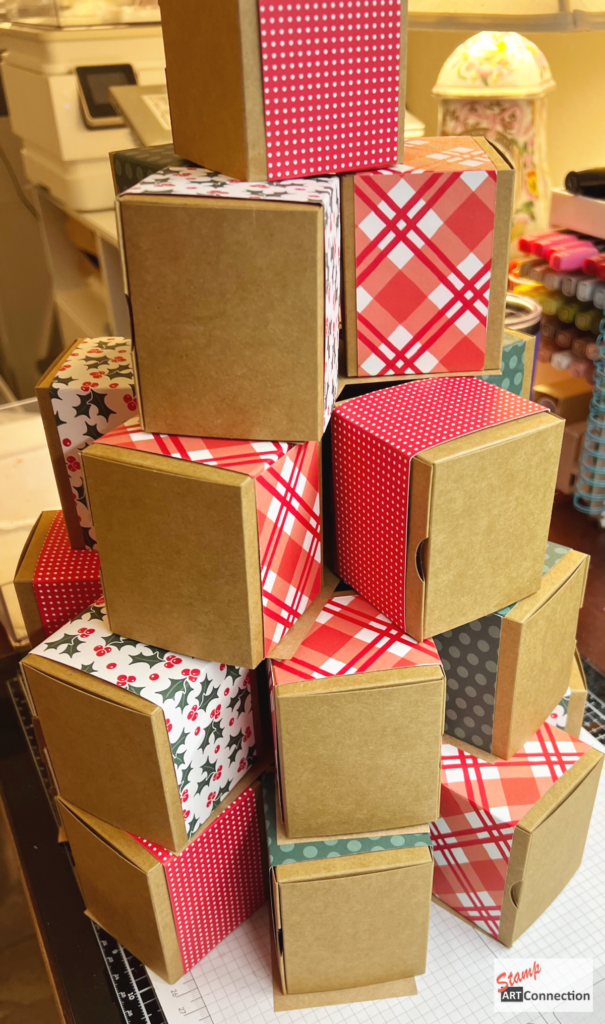
MIX IT UP: Use NEUTRAL NOEL DSP:
My second Advent Tree was made with NEUTRAL NOEL DSP for a more subtle yet sophisticated vibe. Ink colors here are Mossy Meadow, Cherry Cobbler, Crumb Cake and Copper Clay.


🎄 Assemble Your Advent Calendar Tree
Once your DSP-covered boxes, tags, cardboard layers, and platform are ready, it’s time for the really fun part—watching your Christmas tree take shape!
As you assemble the layers, continue checking your DSP patterns and label colors from every side.
You want those Poppy Parade, Peaceful Pine, and Pecan Pie elements distributed throughout the tree so your eye travels around the entire project.
The result is a dimensional Christmas tree that looks beautiful from multiple angles—and hides 24 little Christmas surprises!
🎁 What Can You Put Inside?
Don’t think Advent calendars are just for kids! These little boxes can be filled with all kinds of surprises.
Try chocolates, tiny ornaments, jewelry, craft supplies, handwritten messages, Christmas activities, inspirational sayings, little keepsakes, or clues leading to a larger present.
You could even customize the contents for a spouse, adult child, friend, coworker, or fellow crafter.
Imagine making one for a crafty friend and filling the boxes with 24 tiny papercrafting surprises!
❤️ A Christmas Project to Enjoy Year After Year
What I especially love about this project is that it isn’t simply an Advent calendar. It’s also a piece of handmade Christmas décor.
Using the gorgeous Timeless Christmas Designer Series Paper along with the Advent Treat Boxes and Advent Labels Bundle turns 24 simple boxes into a Christmas centerpiece filled with surprises.
And because you’re creating it yourself, no two Advent Trees have to look alike.
Change the DSP. Change the colors. Add more sparkle. Keep it traditional. Make it elegant. Make it whimsical.
That’s the fun of papercrafting!
🎥 Be sure to watch my complete video tutorial to see how I prepare the boxes, create the tags, build the cardboard support layers, and assemble all 24 Advent Treat Boxes into the finished tree.
❤️ Stamp ART Connection
Your connection to beautiful cards…and creative papercrafting!