
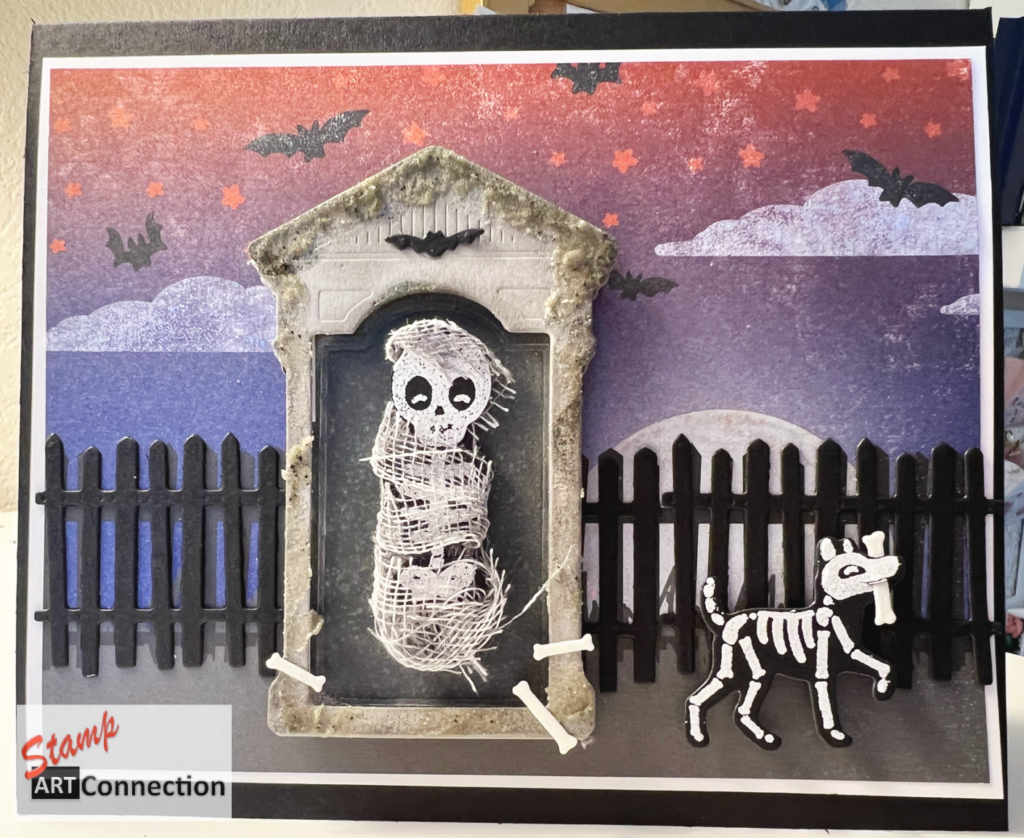
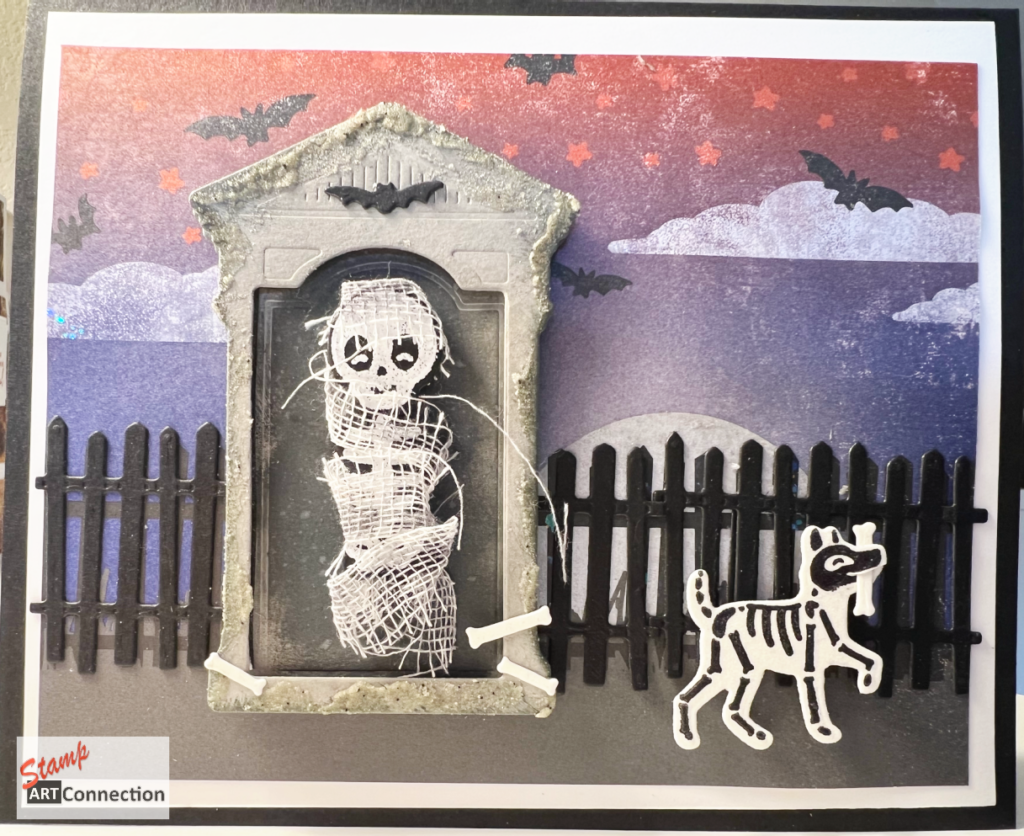
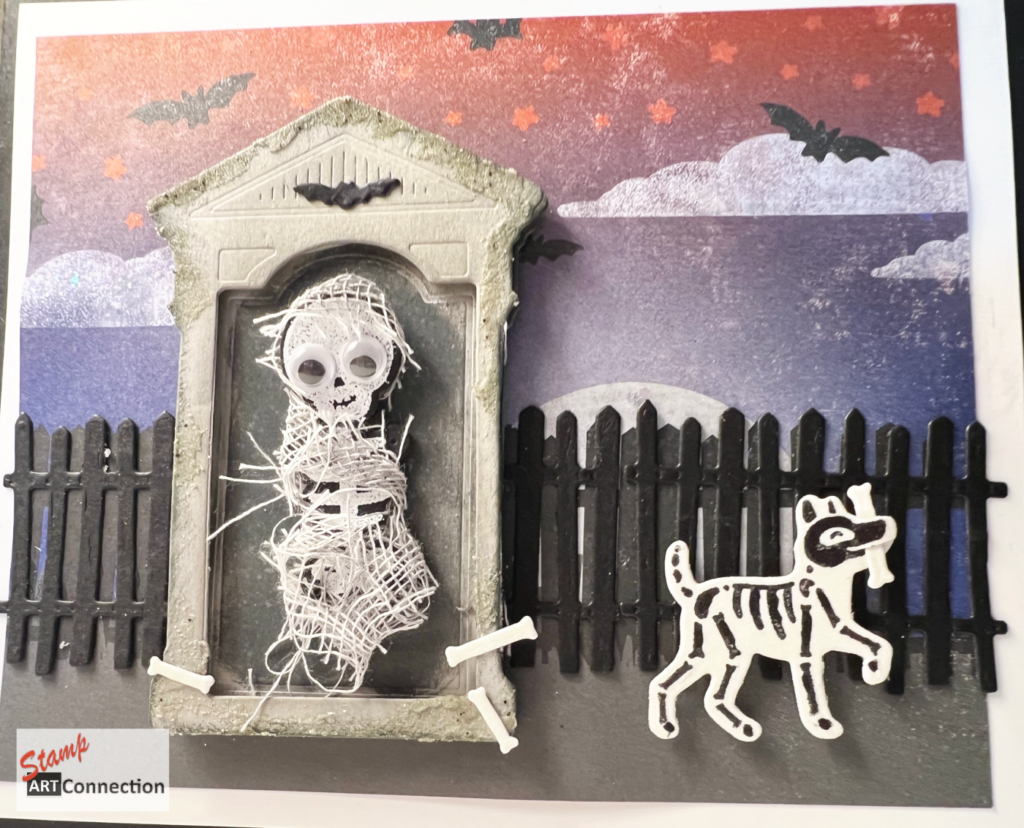
This card project features the BAG OF BONES Bundle, THEM BONES DSP, GLOW-IN-THE-DARK Specialty Paper, and some other exciting products that come together to create a whimsical visual storytelling experience. Get ready to embark on a Halloween-themed adventure as we dive into this creative project!
THEM BONES SUITE COLLECTION
Let’s start with the star of the show, the BAG OF BONES Bundle. This versatile bundle includes a unique collection of bone-themed stamps and coordinating dies. With these, you’ll be able to create endless possibilities for your spooky creations. Whether it’s skeletons, skulls, or other bone designs, you’ll have all the tools you need to bring your vision to life.
To add an extra touch of intrigue, we’ll incorporate the THEM BONES Designer Series Paper. This stunning paper is a Halloween lover’s dream, with its variety of spooky designs and patterns. From hauntingly beautiful skulls to eerie graveyard scenes, this paper provides the perfect background to complement and enhance our card fronts. The rich colors and intricate details will captivate anyone who receives your handcrafted masterpiece.
Now, let’s talk about the element that will truly elevate this project: the GLOW-IN-THE-DARK Specialty Paper. Can you imagine the excitement when your recipients see their cards glowing in the dark? This paper adds a magical touch to our Halloween-themed creation and takes it to a whole new level of spookiness. Whether it’s ghostly dog shapes or glowing skeletons, the possibilities are endless with this specialty paper.
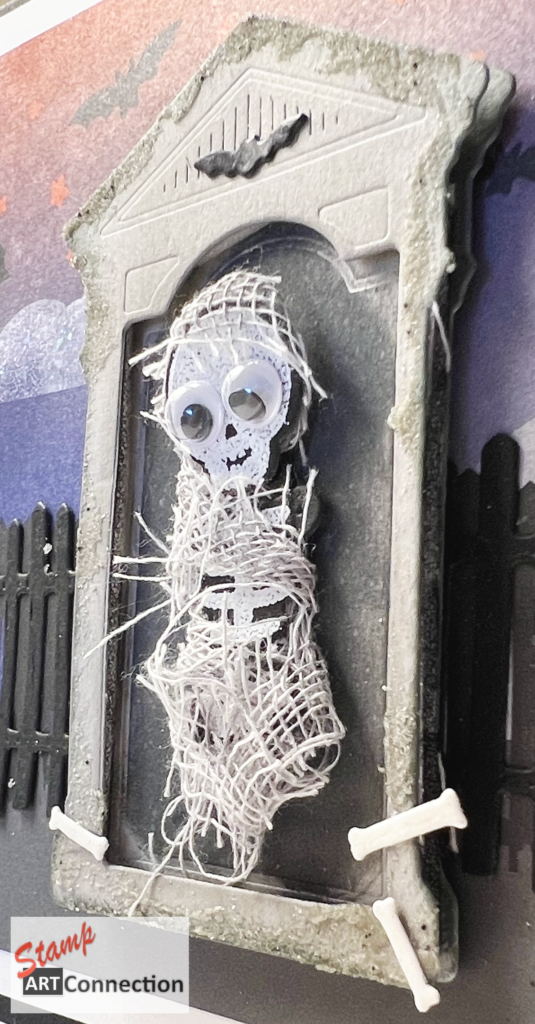
Mummy Wrappings
But let’s not forget our “crypt robber” and their precious loot – the bones! We’ll create a skeleton mummy using Basic Black cardstock embossed with WHITE EMBOSSING Powder. The mummy’s loosely desheveled mummy wraps reveal the bones falling out! The mummy wrappings are made with the Idea-ology Mummy Cloth, adding an authentic touch to our spooky character. And to complete the look, we’ll use Distress GRIT-PASTE in “CRYPT” to provide a tinted, translucent surface with black flecks. This will create a textured effect around our “stone” crypt, making it look like it’s been standing for centuries.
Where to Get Products
If you’re itching to get your hands on these incredible products and start crafting right away, you’ll want to explore the December 2023 MINI CATALOG. Inside, you’ll find not only the items we’ve mentioned but also a treasure trove of other crafting supplies that will inspire your creativity throughout the year.
If you want a copy of the catalog or have any questions about the process, feel free to reach out to me. I’d be more than happy to assist you and provide you with all the information you need to bring your Halloween crafting dreams to life.
Remember, the secret to a successful project is to have fun and let your imagination run wild. So grab your supplies, put on your favorite spooky playlist, and get ready to create something truly enchanting!
Don’t forget to hit the “LIKE” button and leave a comment to let me know what you think! I’m excited to see your own unique twist on this delightful Halloween project. Happy crafting!
Happy crafting!
Video Tutorial
Supply List & Measurements Used for this Project
- BASE CARD: Basic Black Card Stock – 6″ x 10″ and scored at 5″ to create a 5″x 6″ card size
- LAYERS:
- Basic White Card Stock – cut TWO for 4.75″ x 5.75″ for a layer and one for inside sentiment
- Them Bones DSP Card Front Layers cut 5.5″ x 4.25″
- STAMP & DIE CUT:
- Using the BAG OF BONES Bundle of DIES
- Cut two Crypts in Smokey Slate card stock with with die
- Use tombstone die to cut one of the crypts for an opening
- Use Sponge Dauber to sponge edges with Smokey Slate & Basic Grey Inks
- Sponge the inside background of the crypt with DISTRESS BLACK SOOT ink and then (using a blending brush) splatter with water for a cool effect.
- Using DISTRESS GRIT PASTE in “Crypt” and with a palate knife gently add paste around the edges (refer to the video)
- Use FOAM ADHESIVE STRIPS to assemble the crypt.
- TIP: I used BLACK “SHARPIE” pen to color strips along the edge.
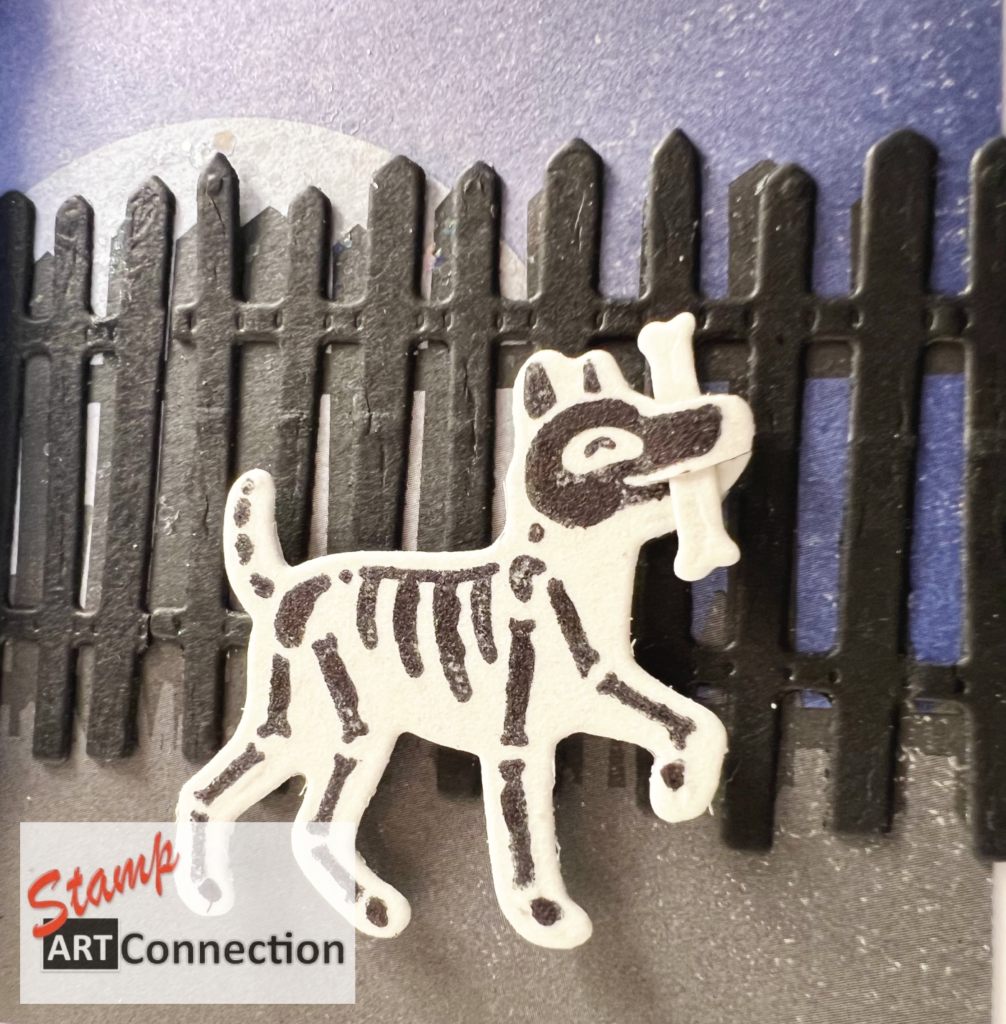
- Stamp the Skeleton Dog with STAZON INK on the GLOW-IN-THE-DARK 6″ x 6″ SPECIALTY PAPER and cut with the coordinating die
- Stamp the Mummy skeleton with VERSAMARK and emboss with WHITE EMBOSSING Powder on Basic Black cardstock and cut with dies
- Follow the video to wrap the skeleton with IDEA-OLOGY Mummy Cloth in a 3.75″ strip, cut it in half, and color with SMOKEY SLATE STAMPN’ BLENDS markers to age the wrappings! Refer to the video.
- Cut three fences with Basic Black CS and cut a BAT for the front of the crypt
- Cut “bones” out of GLOW-IN-THE-DARK 6″ x 6″ cardstock
- Using the BAG OF BONES Bundle of DIES
- INKS:
- Basic Grey
- Memento Black Ink
- EMBELLISH:
- Use DECO ART “Galaxy Glitter” in CLEAR ICE COMET to paint clouds and moon
- Stampin’ TRIMMER
- Heat Tool
- Multi-Purpose Glue (TOMBOW) / Fine Tip Glue
- Glue Dots
- Mini & Regular Dimensional(s)
- Stampin’ Cut & Emboss Machine
Featured Products & ON-LINE STORE:
Here are some of the featured products available in the Annual Catalog and available on my ONLINE store…so convenient — just click and it will ADD TO YOUR CART below:
Love this! It is so cute! Am going to try it!.
I’m another person who saw your INSPIRED project through Mary Fish’s post. Love all of your awesome details.
hahaha! I saw your page through Mary’s email. This is ingenious! Love it! What an awesome spin on this set! You are very creative indeed! LOL! Thanks for sharing with all of us 🙂