Every year I create handmade Valentine treats for the amazing children served by the Child Life Program at University of New Mexico Children’s Hospital.
And every year I ask myself:
How can I stretch my supplies so I can give more?
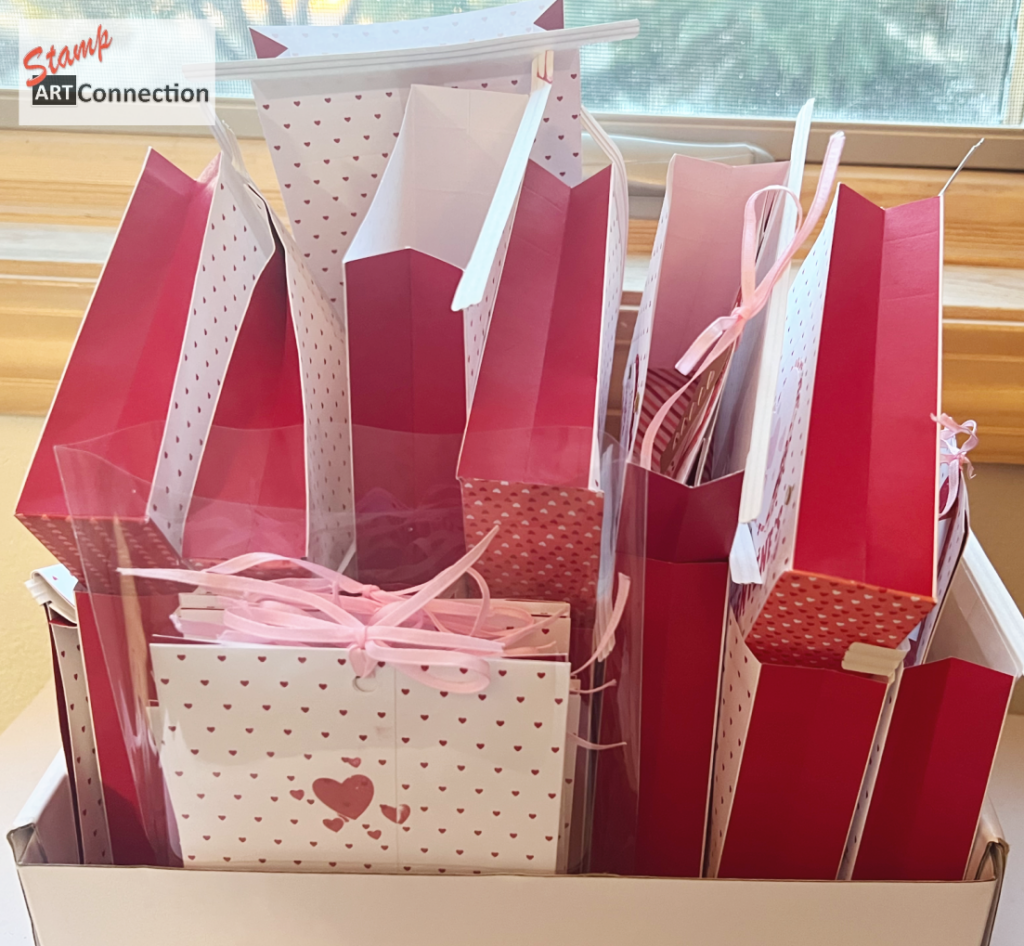
This year, the answer came from the Made With Love Suite Collection — specifically those adorable hearts gusseted treat bags.
With a little creativity (and a paper trimmer), I doubled my treat bags.
Yes. Doubled. 🙌
The Trick: Cut the Bags in Half
These gusseted treat bags measure about 9½” tall.
Cut them at 4.75″ and suddenly:
- 16 bags become 32 treat holders
- You use the original sealed bottoms on half
- You create new bottoms for the other half
- No waste. No extra cost. Twice the impact.
That’s crafting math I can get behind.
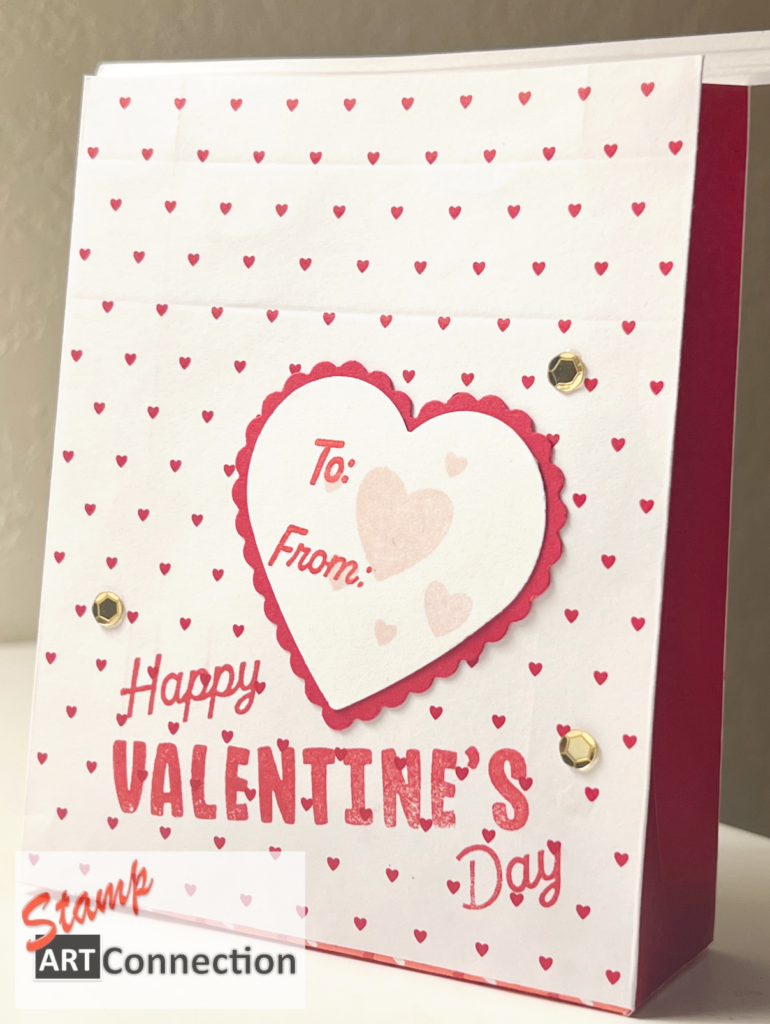
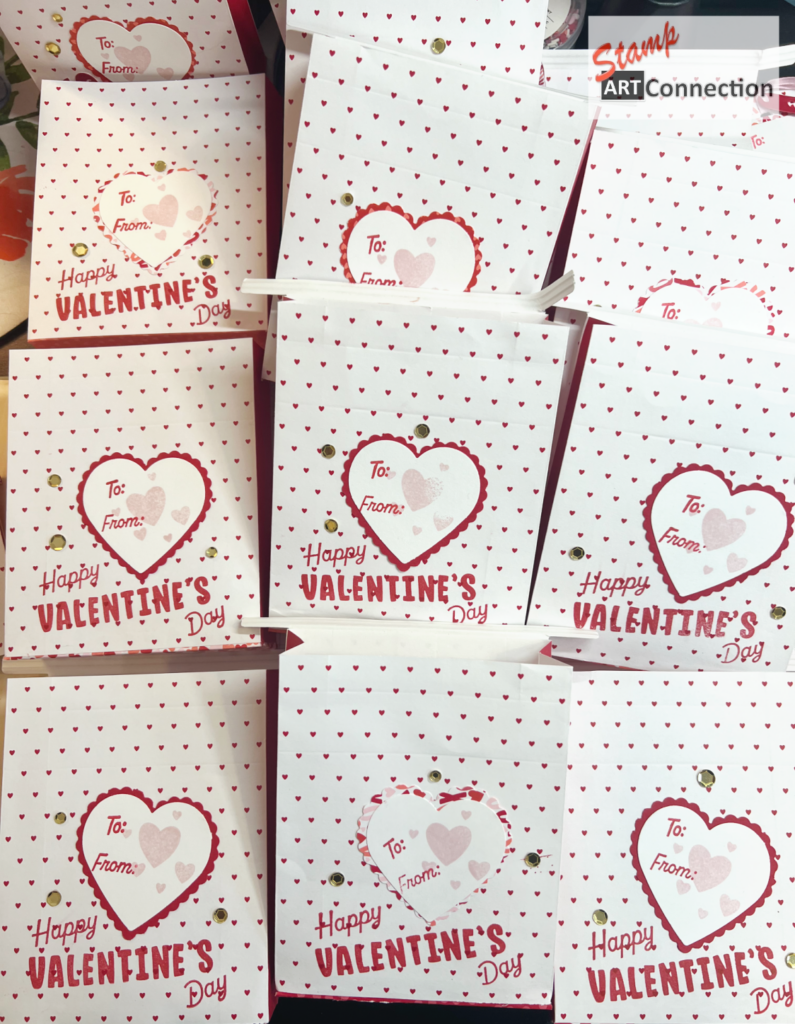
Stamp First
Before assembling, stamp your sentiment using Endless Love Stamp Set and Real Red Ink on the front of each bag section.
Stamping while the bag is flat gives you the cleanest image and saves frustration later.
For the Original Bottom Bags
Punch a 2″ circle hole centered near the top.
Thread a 13″ piece of Bubble Bath Faux Linen Ribbon through the hole to create a soft, pretty closure.
Easy. Polished. Sweet.
For the Cut Bags: Create a New Bottom
This is where the magic happens ✂️
Cut cardstock to:
2.74″ x 5″
Score:
- .5″ and 3/8″ along the long edge
- .5″ on both short ends
Then:
- Fold on score lines
- Snip and bevel the corners
- Apply adhesive to tabs
- Slide onto the open end of the bag and secure
Now you have a perfectly finished bottom that looks like it came that way.
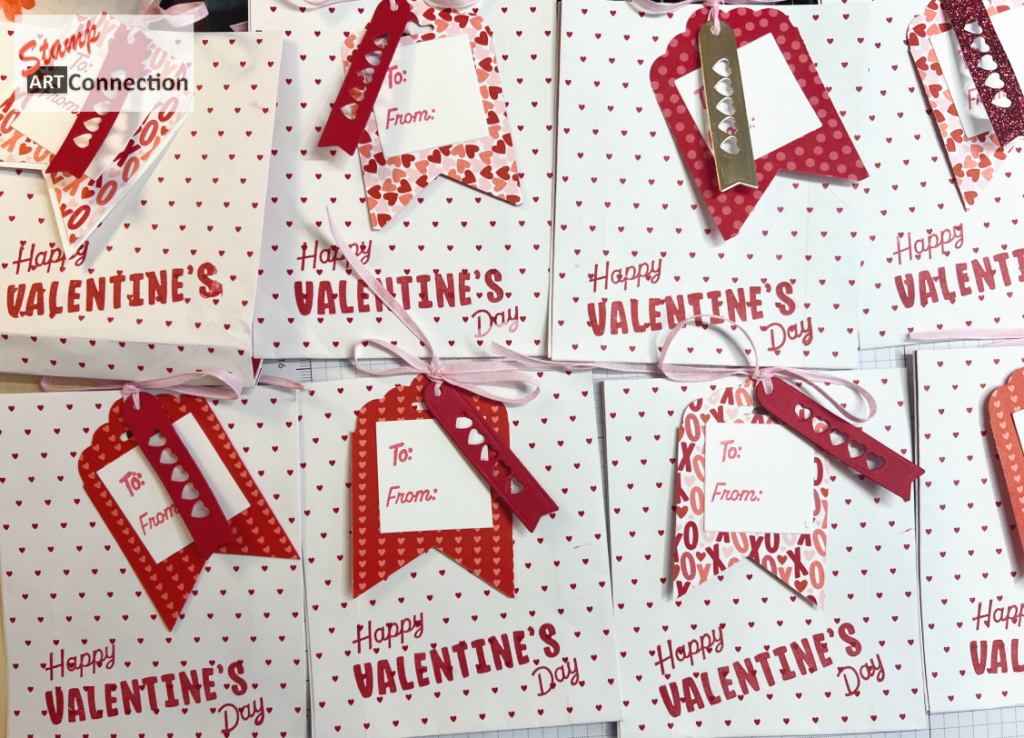
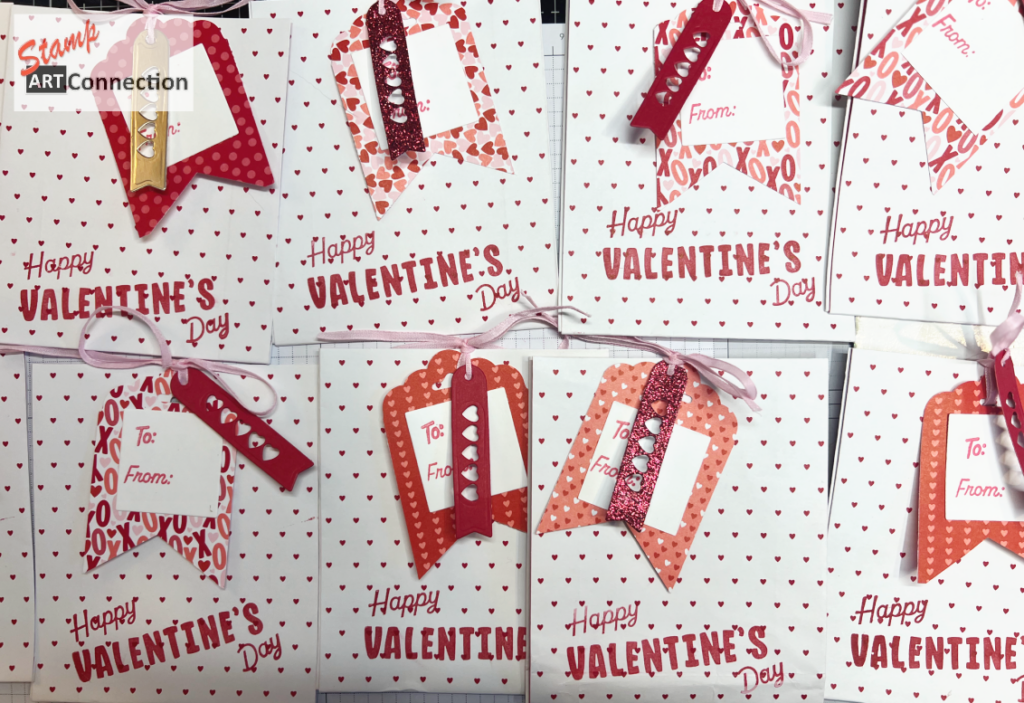
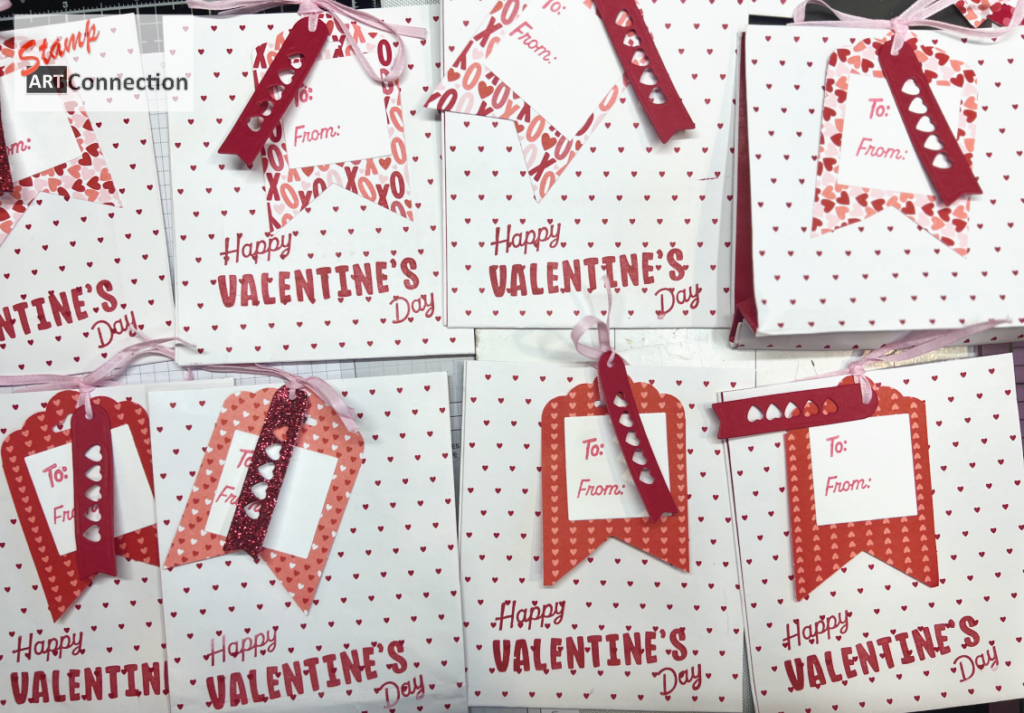
Create Adorable Tags with Your Punches
Time to decorate! Pull out those favorite punches:
- Scalloped Tag Topper Punch
- Curvy Corner Punch
- Heart Punch Pack
Layer tags, hearts, and corners to create sweet dimensional accents.
Tie onto the ribbon and you instantly elevate the project from “cute” to “handmade with love.”
Finishing Touch
A sprinkle of Loose Gold Sequins adds just the right amount of sparkle without overwhelming the design.
Why I Love This Project
This isn’t just a treat bag.
This is:
- Stretching supplies
- Using what you already own
- Making more for less
- And sending handmade love to children who truly need a smile
That’s the heart of paper crafting.
Measurements At A Glance
| Piece | Size | Notes |
|---|---|---|
| Treat Bag | Cut at 4.75″ | Creates two bags |
| Bottom Insert | 2.74″ x 5″ | Score .5″ & 3/8″ long side, .5″ ends |
| Ribbon | 13″ | Thread through 2″ hole |
| Hole Punch | 3/8″ circle | Centered near top |
Crafty Tip 💡
If you have retired punches, mismatched DSP scraps, or leftover ribbon bits — this is the project to use them. Every bag can be slightly different, and that handmade variety is part of the charm.
Made With Love. Given With Love.
Projects like this remind me why I craft.
Not for the card.
Not for the supplies.
But for the smile on the other end.
And this year, thanks to a simple cut at 4.75″, I get to send twice as many smiles to the kids at UNM.
That’s a win in my book. ❤️
GALLERY
Hearts “free standing” Treat Bags
Gusseted Treat Bags with Tags
VIDEO TUTORIAL
FEATURED PRODUCTS