
🎃 Spooky Pop-Up Card Tutorial with the Potions & Spells Bundle 🧙♀️
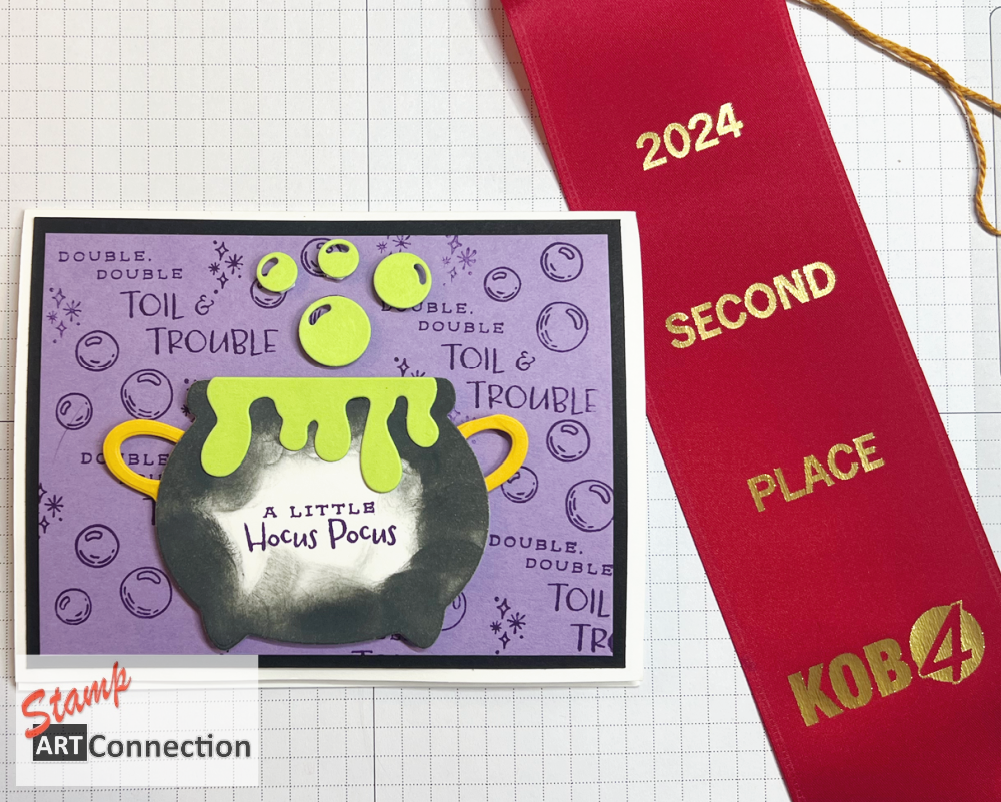
NEW MEXICO STATE FAIR – SECOND PLACE WINNER – Ready to conjure up some Halloween magic? Join me in this enchanting tutorial where I’ll guide you step-by-step in creating a bewitching Pop-Up card using the Potions & Spells Bundle—an exclusive offering from Stampin’ Up!’s ONLINE Exclusives collection. This card is perfect for sending chills and thrills to your friends and loved ones this spooky season!
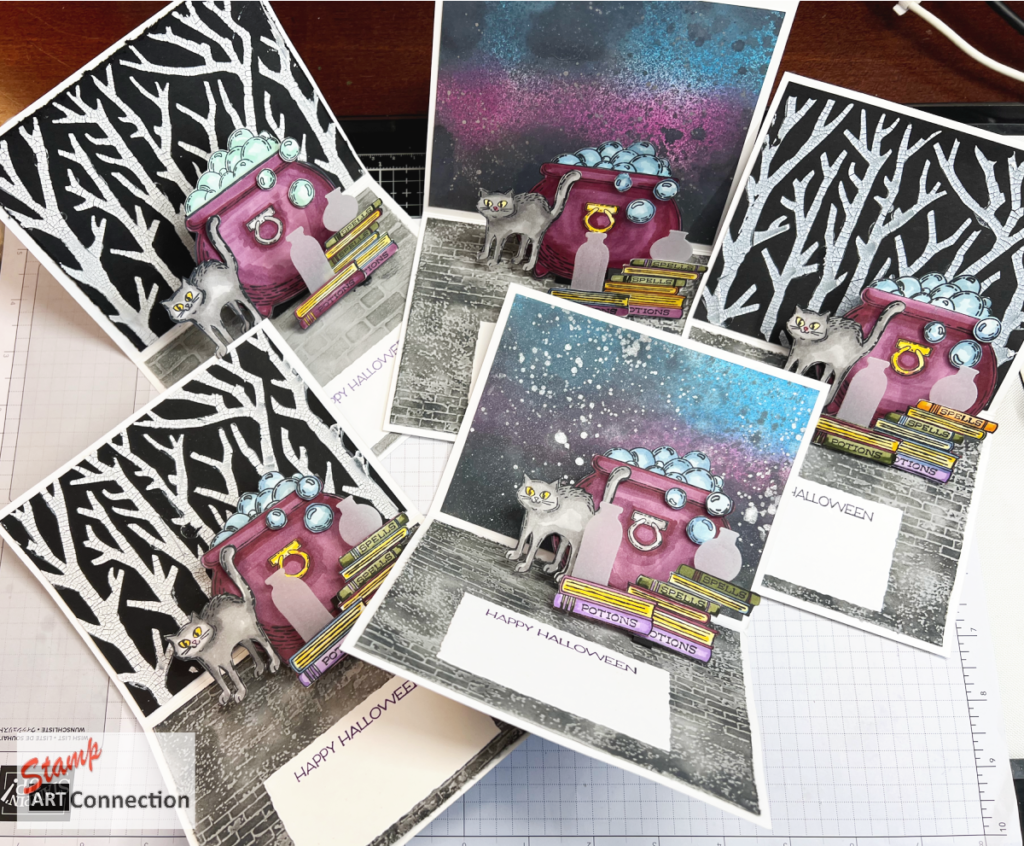
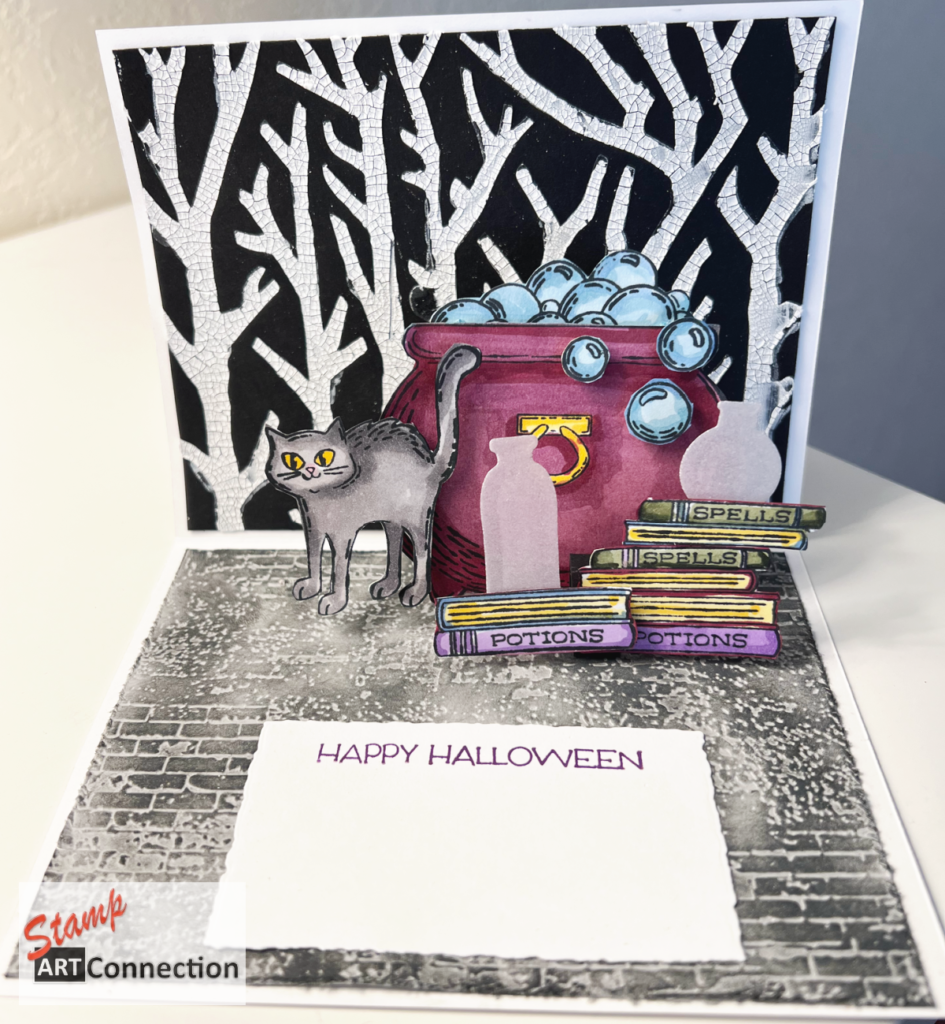
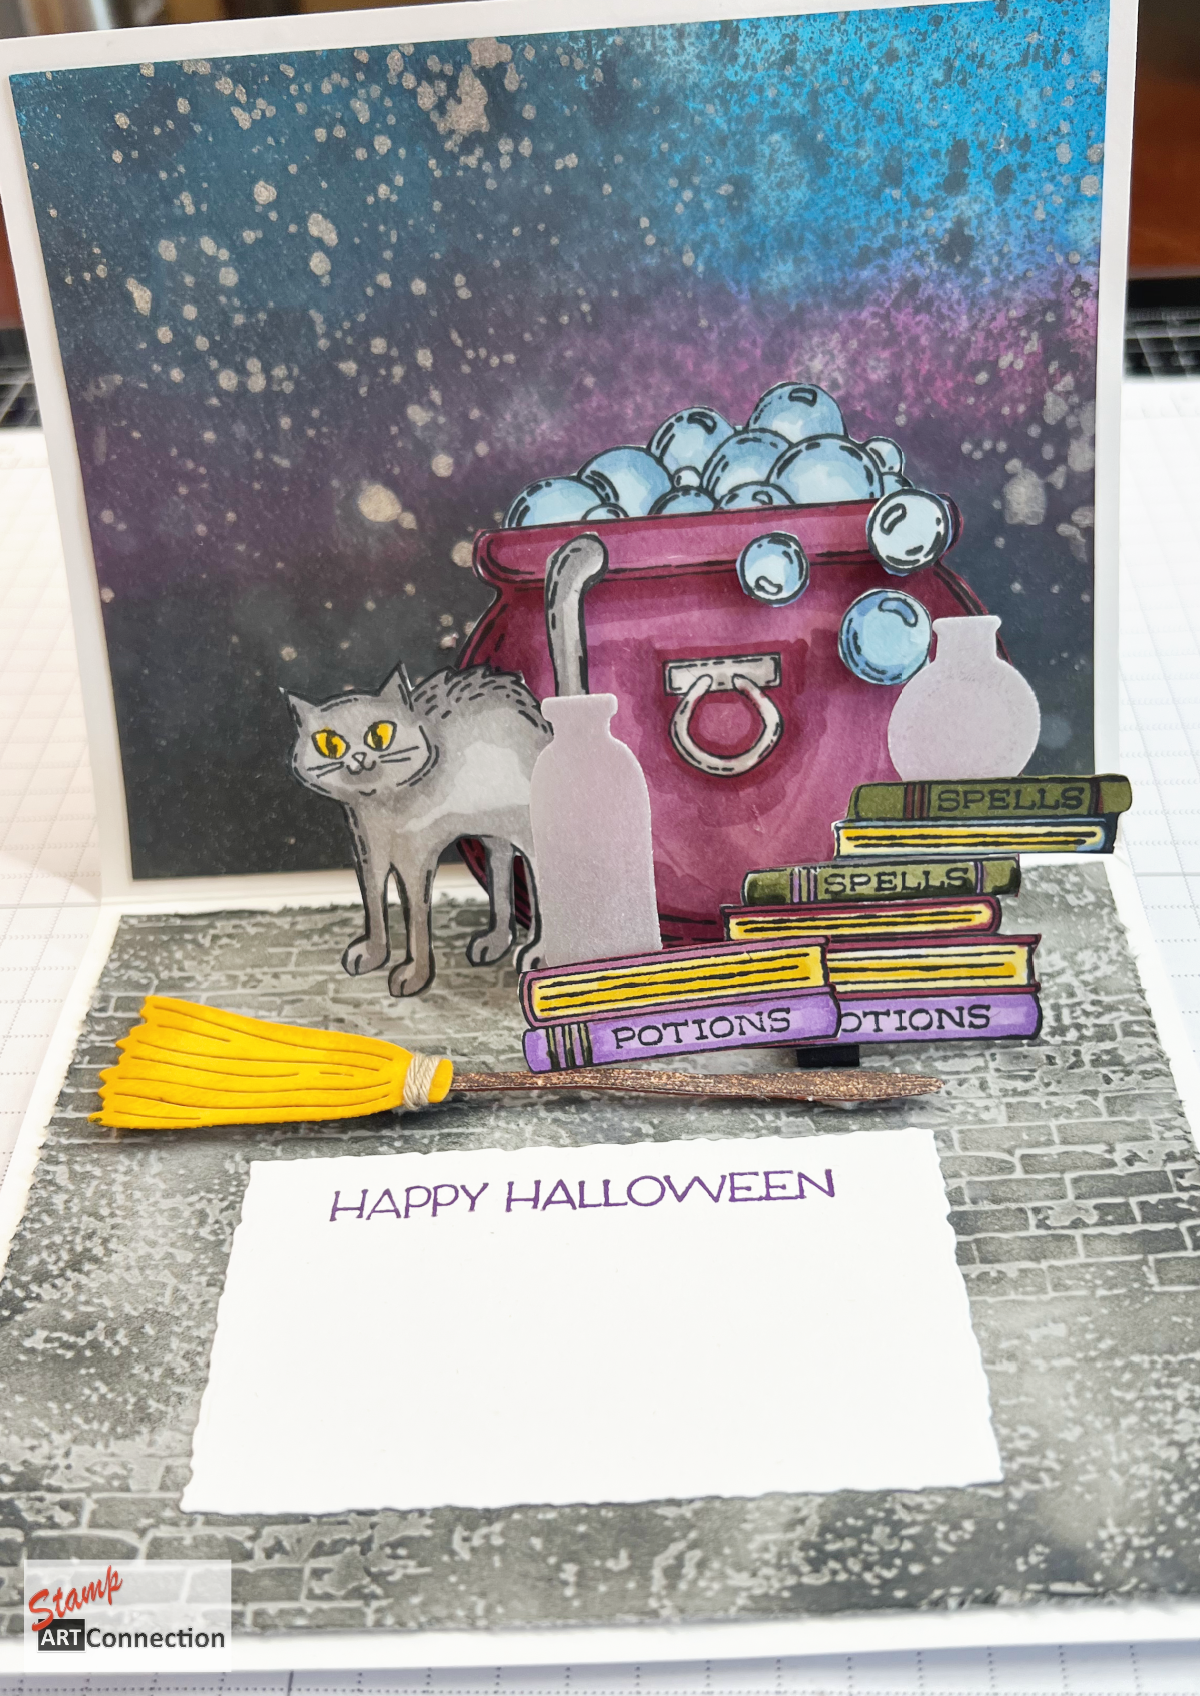
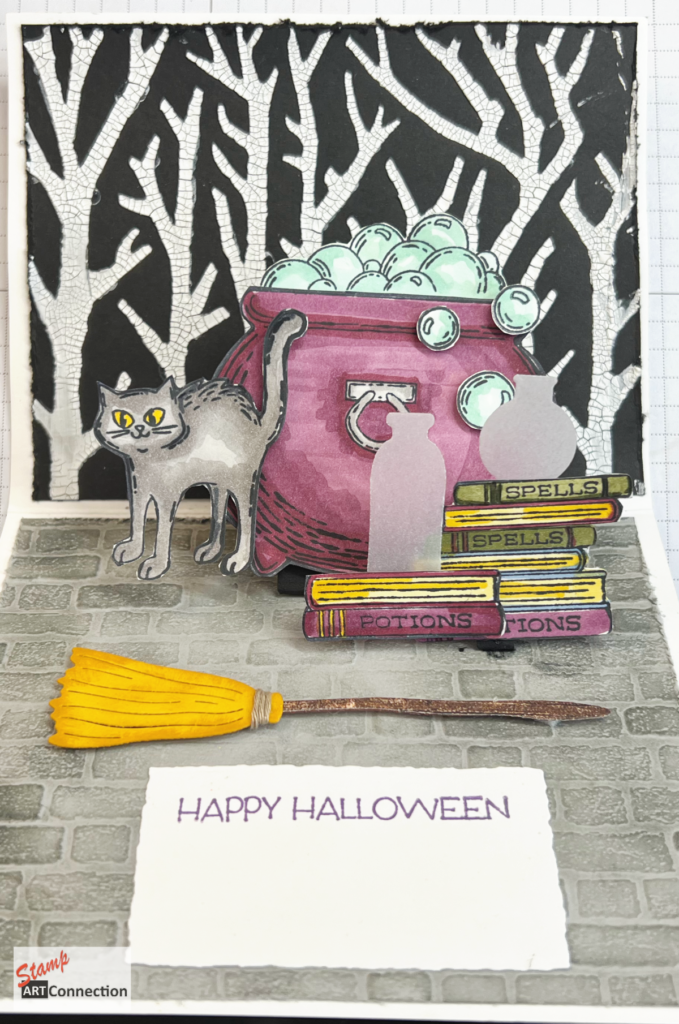
Our card features a bubbling witch’s cauldron, a mysterious black cat, and a towering stack of potion and spell books that pop right out of the card, creating a truly spellbinding 3D effect. I’ll walk you through the process of constructing the pop-up mechanisms that bring these eerie elements to life, as well as show you how to craft multiple hauntingly beautiful backgrounds for both the front and the inside of your card.
What You’ll Need:
- Stampin’ Up! Cardstock: A sturdy base for all your spooky creations.
- Basic White Card Base measuring 5.5″x 4.25″
- need for cutting front cauldron
- Basic Black layers- cut 2 (4″x 5.25″)
- Mechanisms:
- 3″ x 1.5″ (score along 3″ at .5″, 1.5″, 2″)
- 2″ x .5″ (score along 2″ at .5″, 1″ 1.5″)
- Mechanisms:
- Smokey Slate layer for inside – (4″x 5.25″)
- Highland Heather Layer – cut for FRONT (5″ x 3.75″)
- Crushed Curry (handles)
- Granny Apple Green (bubbles)
- Vellum (for vials)
- Basic White Card Base measuring 5.5″x 4.25″
- Stampin’ Blends Markers: Perfect for adding depth and shadow to your cauldron, cat, and spell books featured below.
- Masks & Embossing Paste & Embossing Folder : I’ll show you how to add a ghoulish texture to your backgrounds, enhancing the eerie atmosphere.
- Tree Background Mask (retired) using either Plain or Shimmer Embossing Paste
- or use Distress Texture CRACKLE paste.
- Retired “Basic Pattern Decorative Masks” – for trees
- Embossing Folder – Exposed Brick 3D Embossing Folder or Brick & Motar Embossing Folder (retired)
- Deckled Rectangles Dies: These add a torn, weathered edge that’s just perfect for a vintage witchcraft theme for the inside sentiment.
- Country Wood Designer Series Paper (DSP): A rustic texture for cutting the witches broom and complements the mystical vibes of the card.
- Inks:
- Highland Heather
- Basic Black
- DISTRESS Inks: Distress Oxide in Salty Ocean, Seedless Grape and Black Soot
- Distress Spray Stain in Brushed Pewter and Black Soot
- Tools:
- Blending Brushes
- Precision shears
To make this project even more bewitching, I’ll also be incorporating Distress Oxide Inks and Distress Sprays. These are fantastic for creating moody, atmospheric backgrounds with a touch of grunge—perfect for a spooky Halloween card!
Join the Fun!
Watch as I bring this creepy creation to life, and get inspired to make your own spine-chilling Pop-Up cards. Whether you’re a seasoned crafter or a newbie, this tutorial will equip you with all the tips and tricks you need to make your Halloween cards truly magical.
Stay tuned, and let’s cast some creative spells together!
Happy crafting, and don’t forget to share your creations with us on social media!
Kat
Gallery

Video Tutorial
Products Featured