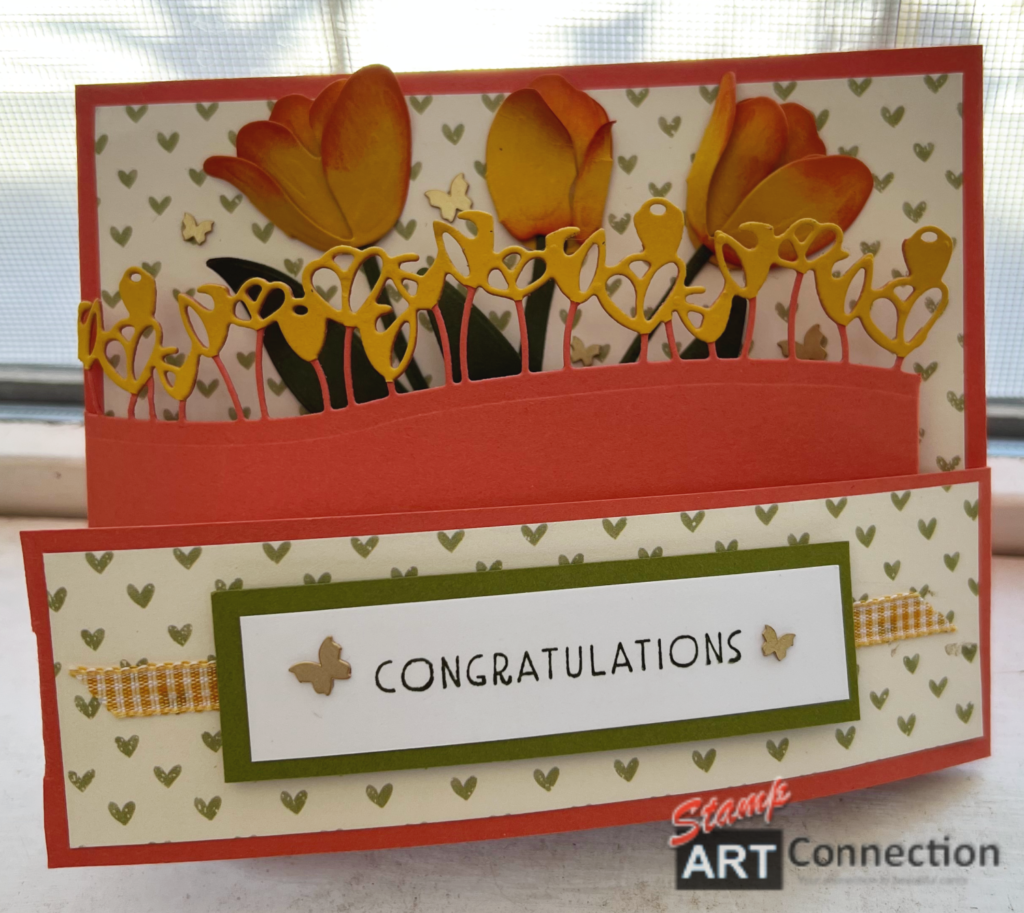
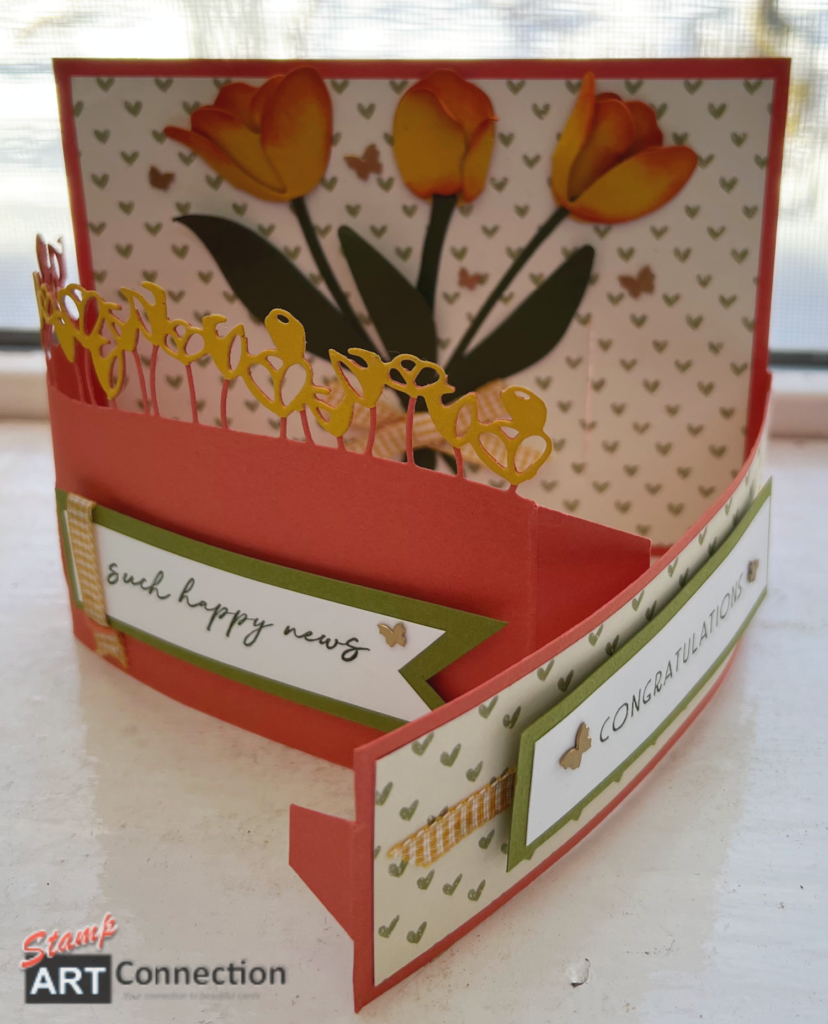
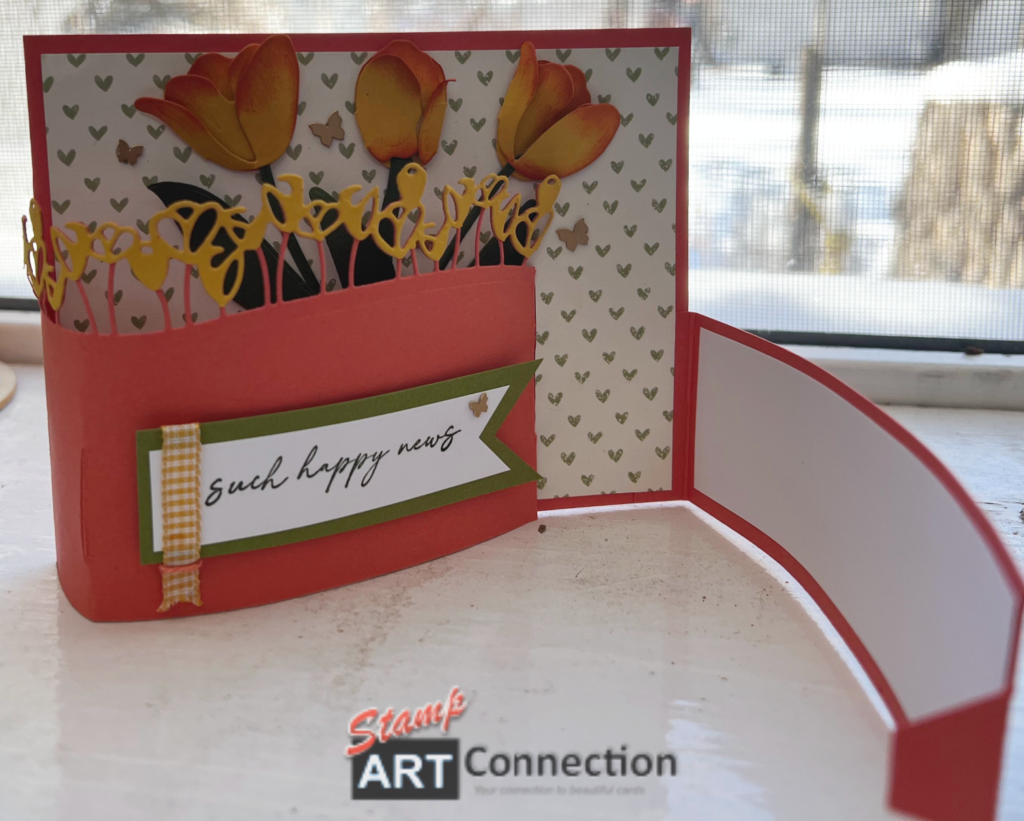
I have so many followers as AVID STAMPERS that love “fancy folds” projects. This project is called a CURVED FOLD CARD. When the tabs are fitted together the card creates a curved dimensional front that stands freely on a shelf or a mantle. My Newsletter Subscribers for March got a FREE PROJECT PDF.
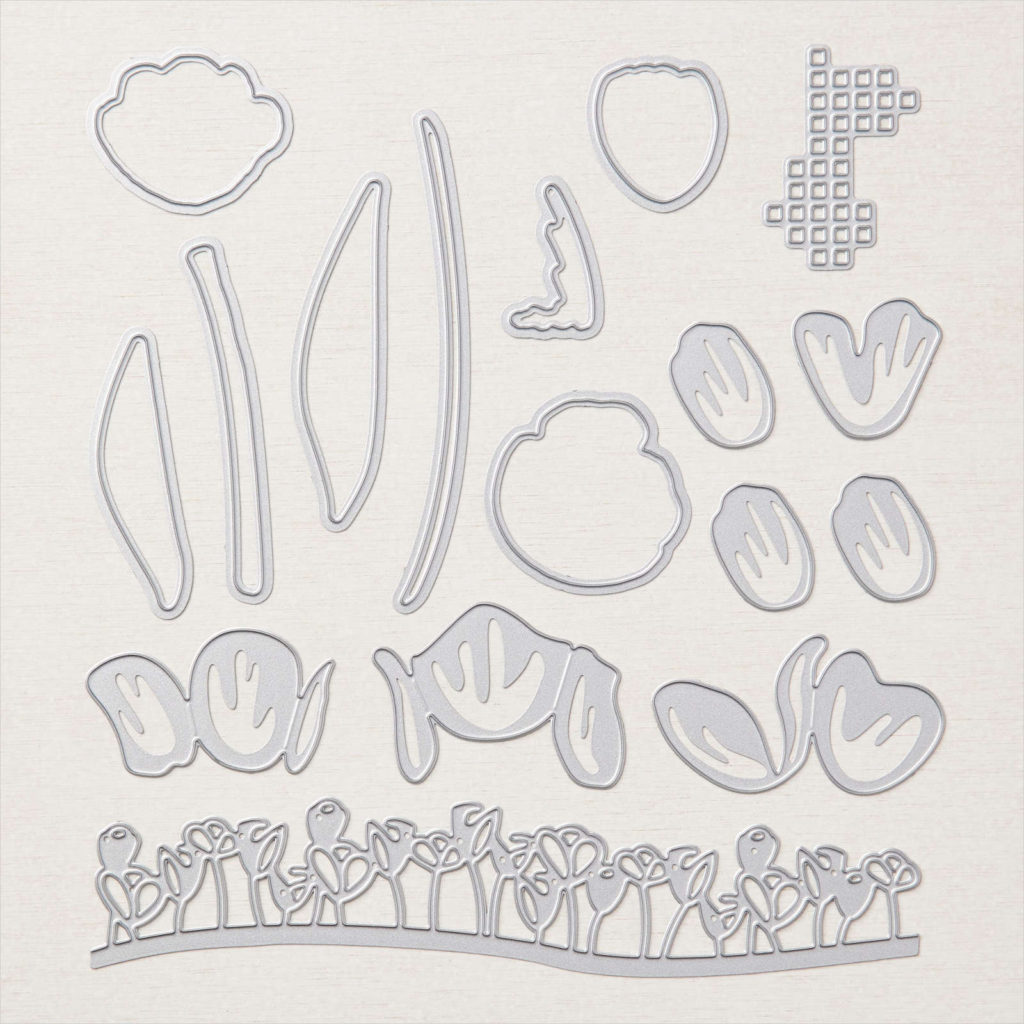
I’ve also produced a video on how to use the Tulip Dies to build the tulips needed for this project. Check out the additional link below.

Video Tutorial
INSTRUCTIONS:
- Begin with 5 ½ x 4 ¼” BASE from Calypso Coral card stock (CS).
- Cut a FRONT piece 6 ½ x 1 ¾” from Calypso Coral CS
- Cut DSP for FRONT 5 ¼ x 1 ½”
- Cut placard for inside FRONT in Basic White using the same dimensions
- Cut a MIDDLE piece 6 ½ x 3 from Calypso Coral CS
- Take your SIMPLY SCORED SCORING TOOL and score along the edges using the measurements shown below and the VIDEO TUTORIAL following the LINK provided.
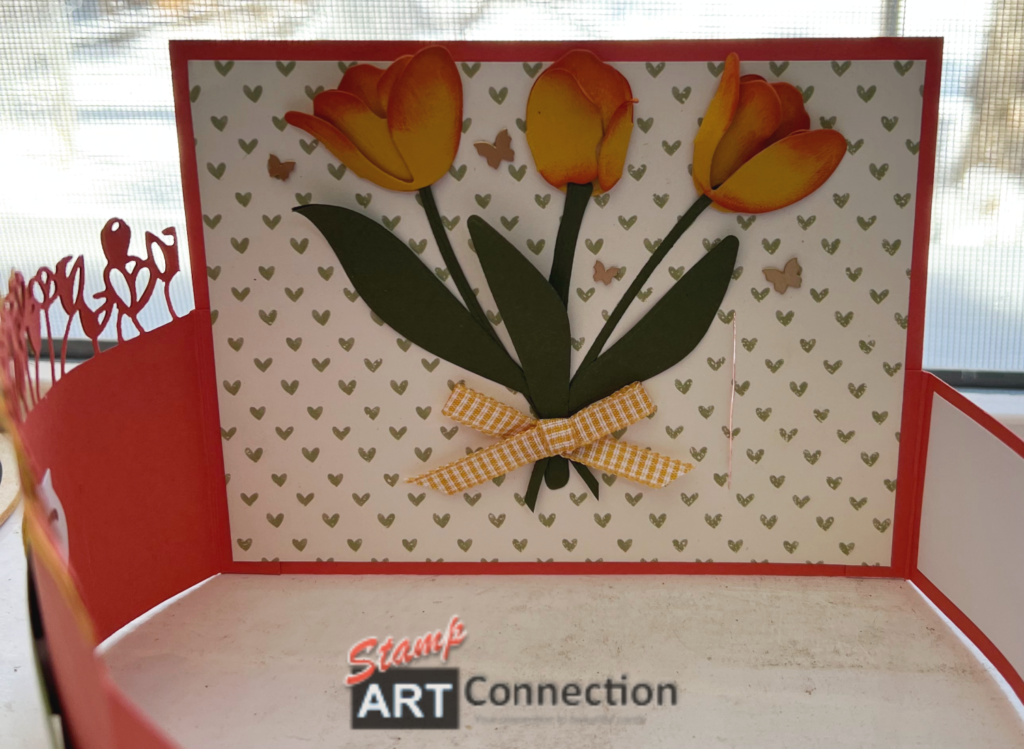
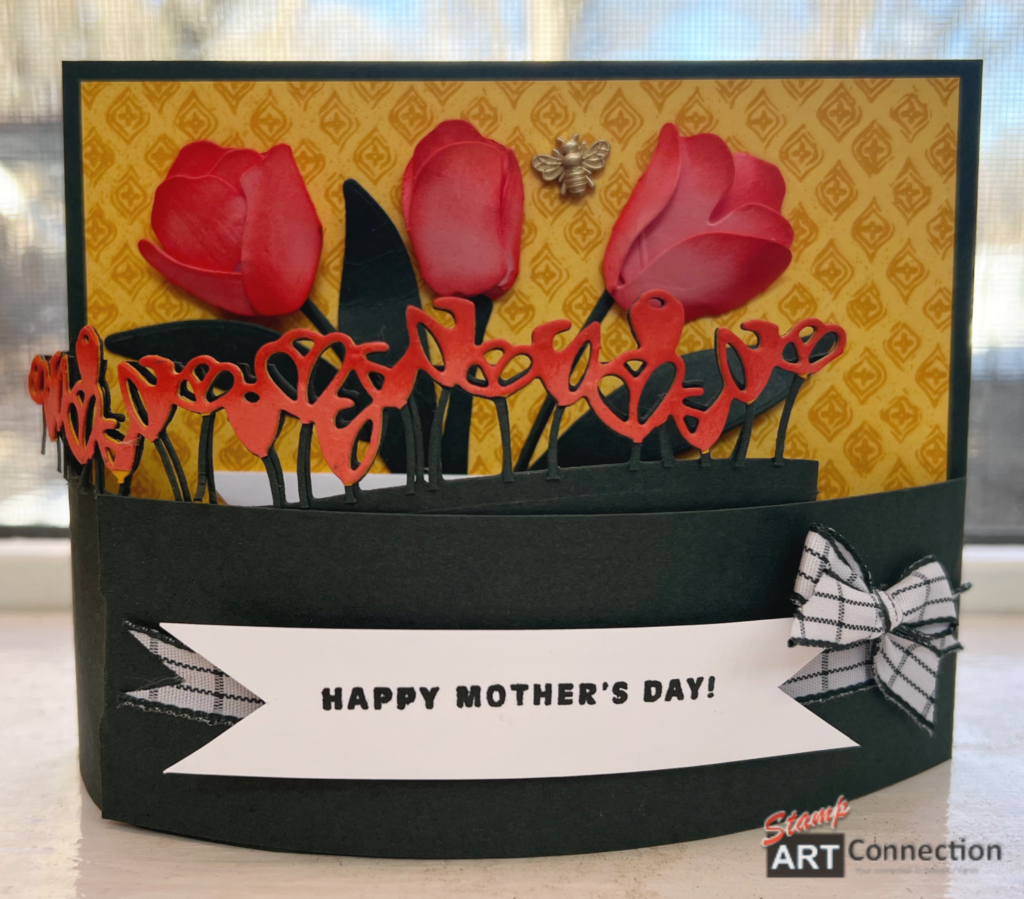
- Take the MIDDLE piece and die-cut using the TULIP edge-let die to create the tulip border as demonstrated in the video.Use Multi-Purpose Adhesive Sheet to cut another piece using the Tulip edge-let from CRUSHED CURRY CS to create the flower tops (refer to VIDEO)
- Clip “tulip tops”. Remove adhesive sheet backing to adhere to MIDDLE piece.
- Place adhesive – tear tape—on each of the ½” scored pieces for the MIDDLE & FRONT
- Adhere the FRONT & MIDDLE to the BASE card.
- Measure for the SLOTS using the template; but double check by folding the FRONT & MIDDLE over to ensure alignment and mark with pencil. Cut.
- Erase pencil lines.
- EMBELLISH:BASE: Assemble flower pieces using a Glue Gun. Set any “extra” pieces aside for use on additional projects.Adhere the flower blossoms to the BASE piece with Tombow Multi-Purpose glue.
- Die cut leaves/stems using the Tulip Dies and arrange the leaves/stems that have been die cut out of Mossy Meadow CS with Tombow glue.
- FRONT: Add coordinating DSP (5 ¼” x 1 ½”) and add your sentiment to your taste and embellish with ribbon. Add Basic White CS for a note.
Please refer to my product recommendations linked below for STICKY GRID information.
PRODUCTS