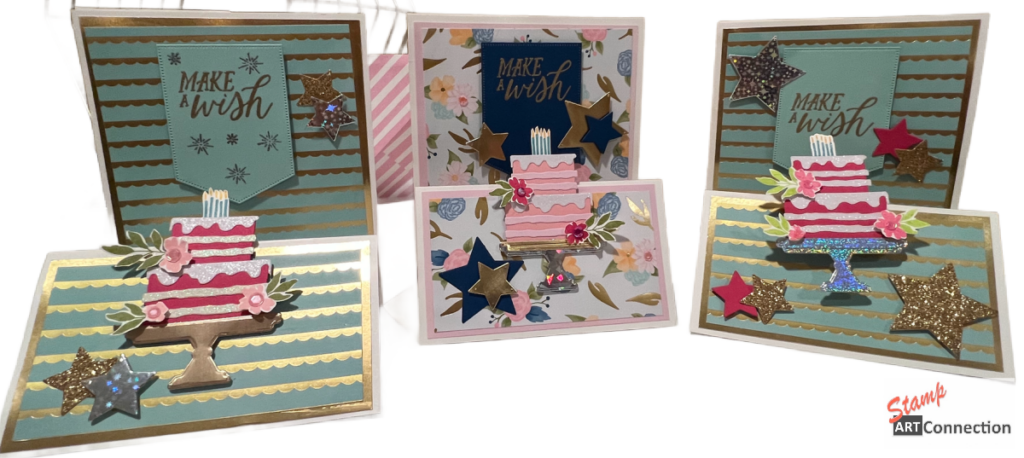
Create a Stunning 5×6 Standing Easel Card with the Wildflower Birthday Suite Collection
Looking for a unique and elegant birthday card design? This 5×6 Standing Easel Card, featuring the gorgeous Wildflower Birthday Suite Collection and the Cake Celebration Bundle, is a showstopper! It’s perfect for making someone’s special day even more memorable.

Materials You’ll Need:
- Cardstock: Basic White 12×12, Pretty in Pink, Melon Mambo, Polished Pink, Petal Pink, and Blueberry Bushel
- Specialty Paper: Gold Foil, Glitter Paper and Iridescent Card Stock
- Designer Series Paper (DSP): Wildflower Birthday DSP
- Foil Sheets: Gold Foil
- Scoring Tool & Bone Folder
- Cut and Emboss Machine
- Adhesive: Liquid glue, dimensionals
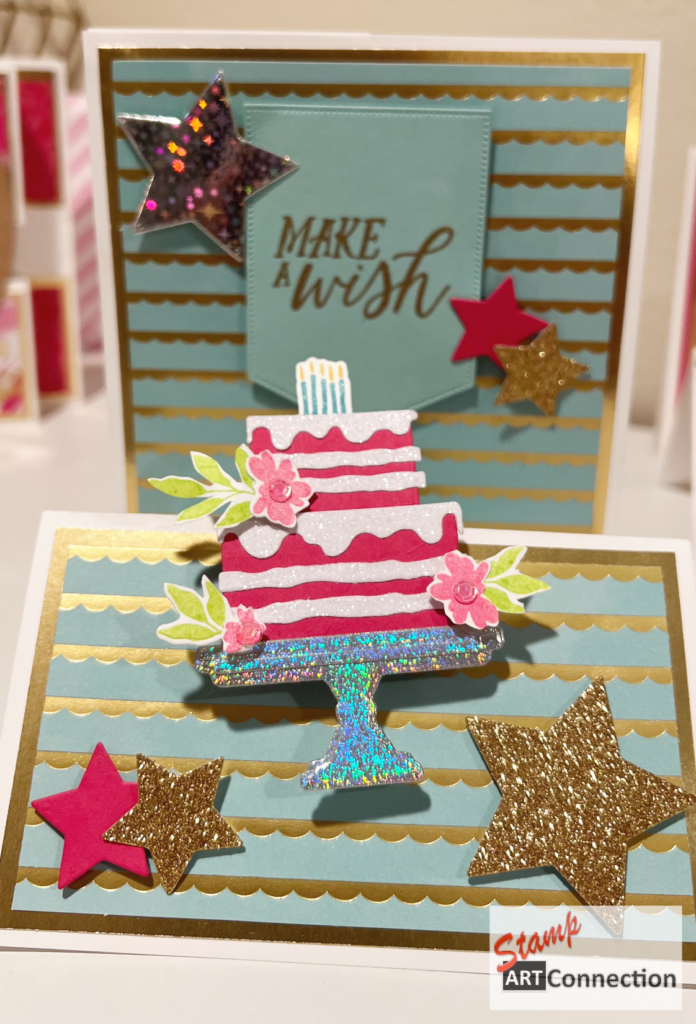
- Decorative Elements: Die-cut stars and layered cakes, stamped images, and embellishments from the Cake Celebration Bundle
Cutting & Scoring Instructions:
Base of the Card:
- Cut a 12” x 5” piece of Basic White cardstock.
- Score along the 12” side at 3” and 6” to create the easel folds.
- Cut a 5” x 6” piece of Basic White for the back panel and score at 2.5” along the 5” side.
Decorative Panels:
For a beautifully layered effect, I used the Wildflower Birthday DSP paired with Gold Foil for each panel.
- Front Panel:
- Gold Foil: 5.75” x 4.75”
- DSP: 5.5” x 4.5”
- Smaller Accent Panel:
- Gold Foil: 2.75” x 4.75”
- DSP: 2.25” x 4.5”
- Back Panel:
- Gold Foil: 5.75” x 2.25”
- DSP: Two pieces, 5.5” x 2”
Color Palette:
To complement the Wildflower Birthday DSP, I incorporated Pretty in Pink, Melon Mambo, Polished Pink, Petal Pink, and Blueberry Bushel for the cardstock elements.
Assembly & Embellishment Tips:
- Adhere the DSP layers to the Gold Foil pieces for a polished look.
- Attach the back panel to the easel base at the 2.5” score line.
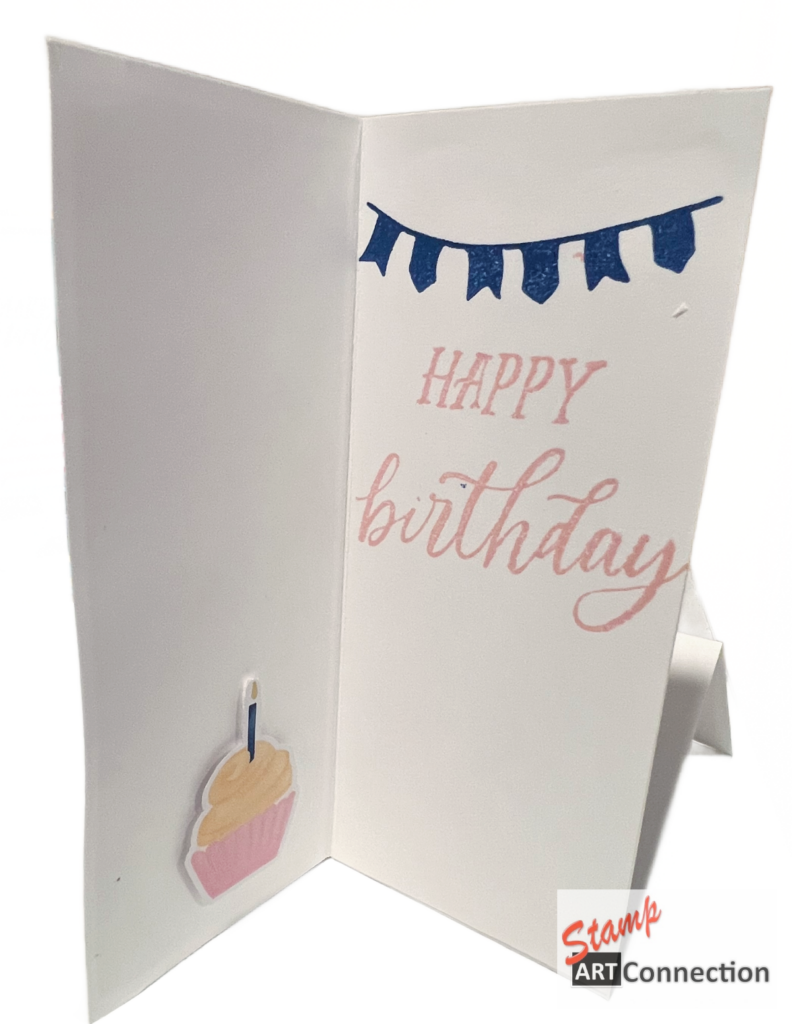
- Decorate the front using elements from the Cake Celebration Bundle—layer cake die-cuts, florals, and birthday sentiments.
- Add dimension by using foam adhesive for focal elements.
- Finish with embellishments like gems, ribbon, or heat embossing for extra detail.
Watch the Video Tutorial!
For detailed step-by-step instructions and creative tips, watch my full video tutorial! You’ll see exactly how to assemble this beautiful easel card and get extra inspiration for embellishing your design.
Have you tried making an easel card before? I’d love to see your creations! Share your projects in the comments or tag me on social media!
Happy Crafting! 🎨✨ Kat
VIDEO TUTORIAL
FEATURED PRODUCTS